I was within minutes of ordering my fluorescent fixture replacement bulbs and ballasts when it hit me. There must be a way to retrofit highly efficient LED lighting to existing fluorescent fixtures. I mean – if there isn’t, let’s start that company right now, right?
So, I went to Amazon and immediately found a number of LED replacement bulb options for fluorescent fixtures.
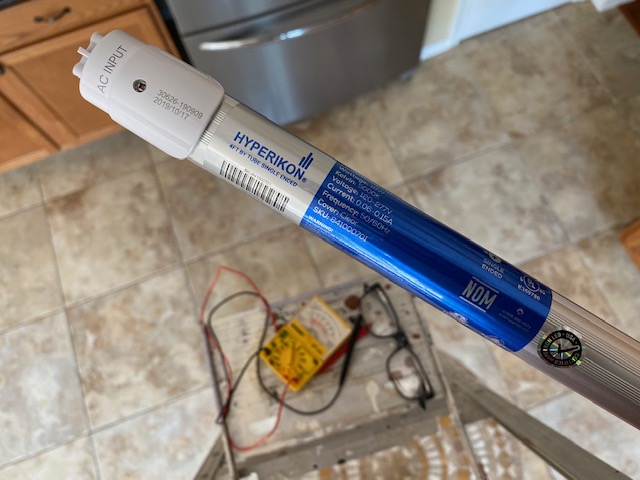
These ‘bulbs’ aren’t really bulbs at all in the conventional sense; they’re a line of ultra-bright LEDs fit inside what ‘looks like’ a bulb, and this assembly is designed to fit into the sockets of the existing fluorescent fixtures. Neat and clean.

Zoom in to the photo above and focus on the clear lens LED replacement bulb in the foreground; you can see the LEDs placed within. In the box right behind are frosted lens LED replacement bulbs, which I found to be best in the kitchen. Please pay no attention to the pink flamingo.
Powering these LED bulbs (I’ll call them that for convenience) can very different from powering fluorescent bulbs, though. The LED replacements that I chose are designed to operate off of plain old house AC, whereas fluorescent bulbs need some special care to light, via the use of a starter and current-limiting circuit assembly – a ballast.
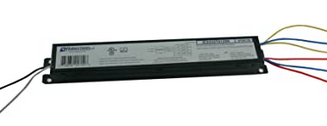
And those [dead/dying] ballasts of mine? Now destined for the garbage.
To make this all work, I had to start by gutting the wiring in the original fixtures and removing the ballasts. I’ll show every step I went through for one of my fixtures – doing the conversion. It wasn’t hard, but you have to be careful, of course, with anything electrical. The pictures below will show my whole process, and this is surely something you can (and should) get a local electrician to do if you’re not comfortable with it!
Converting My Kitchen Fluorescent Fixture to LED
Power must be off to start, naturally.
And, I mean, please be 100.00000% sure the power is really off. Kill the breaker. Turn off the switch too. Have a voltmeter or voltage tester as well, as you can see in the photo above, so that once you expose the house wiring – you can test the absence of voltage yet again. You’ll be on a ladder, probably an aluminum ladder, doing this work. Okay – `nuff said there.
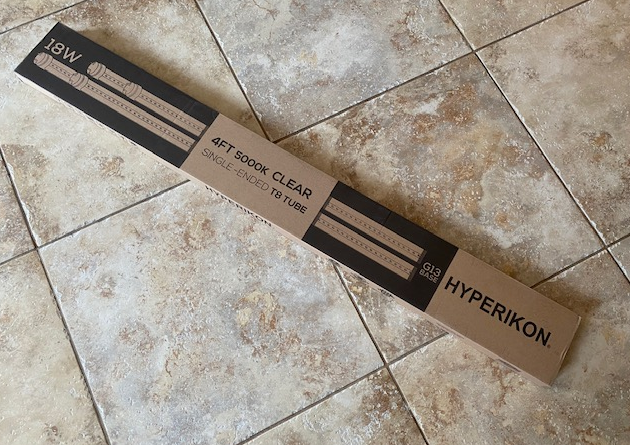
The photo above is also an Amazon link to the specific LED bulbs (Hyperikon Single-ended) I used for this conversion. Once more, these come in clear and frosted lenses. For me, I found the clear lenses great for the 2 fixtures in my basement workshop. For the kitchen, though? I went with the frosted lenses.
Note, on that box above, the words “Single Ended.”
This is the type of LED replacement bulb (tube, really) I needed as I wanted to bypass the ballasts… remove them from these fixtures forever. Thus, these LED light tubes only need to be powered on one end in that configuration. What happens with the pins on the other side? Well, they’re used to hold the LED light in the fixture, of course. But electrically – nothing will be happening there at all.
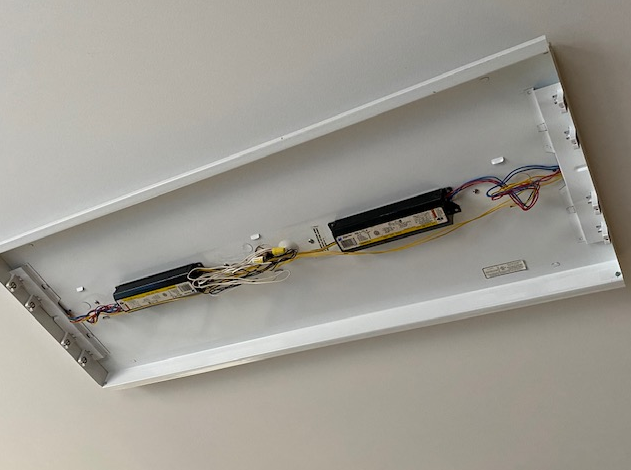
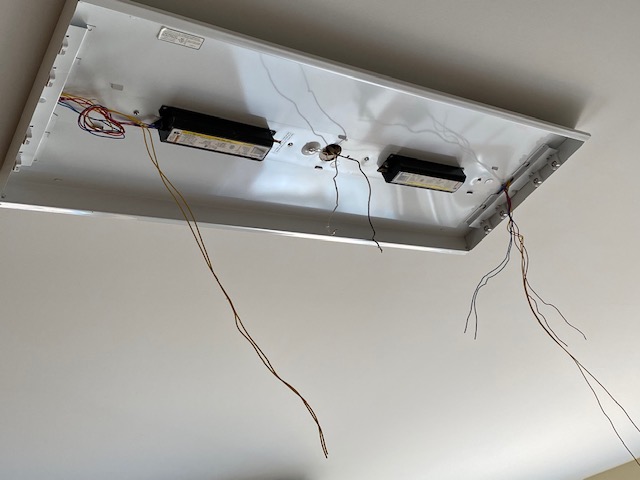
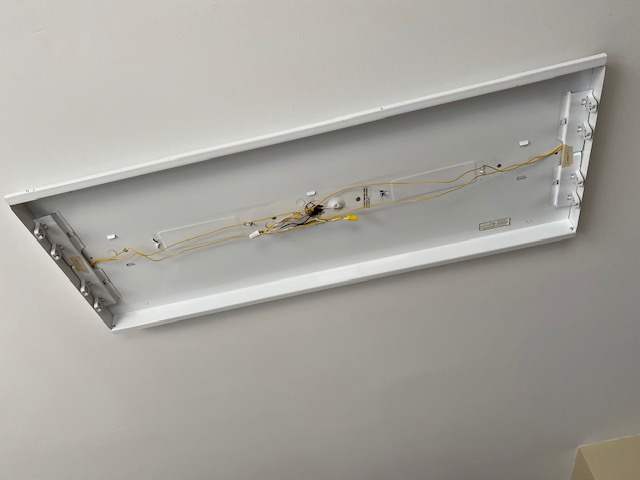
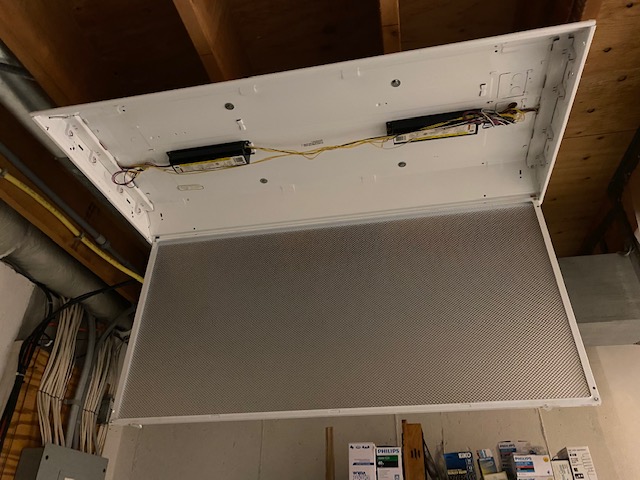
The original wiring, with the 2 ballasts in place, is shown above for my kitchen fluorescent fixture.
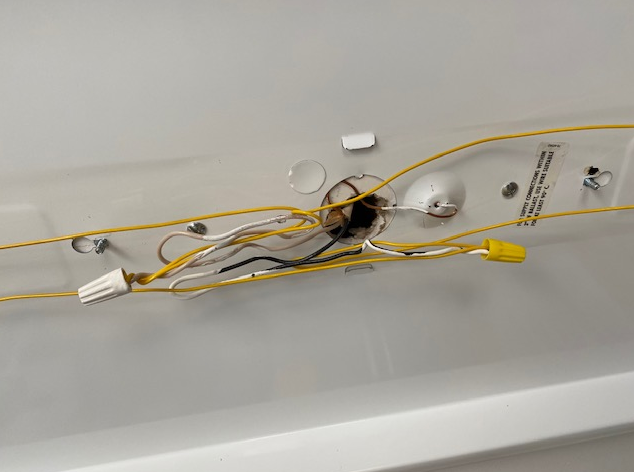
Just below, I’ve ‘liberated’ the house wiring in the center (and re-tested for the absence of voltage) and I also began cutting away some of the wiring to the pin-socket (aka “tombstone”) assemblies on the left and right.
Why haven’t I just gutted everything in total yet?
Because I need to know how those tombstone assemblies are wired first. And until I do, I don’t want to remove wiring that’s soldered nicely in place. What do I mean, exactly?
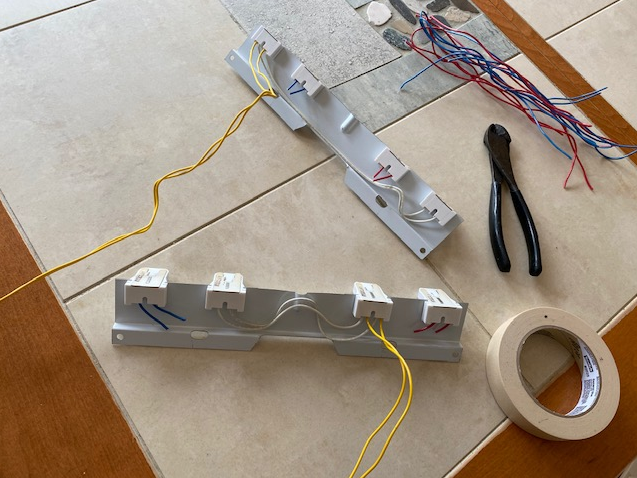
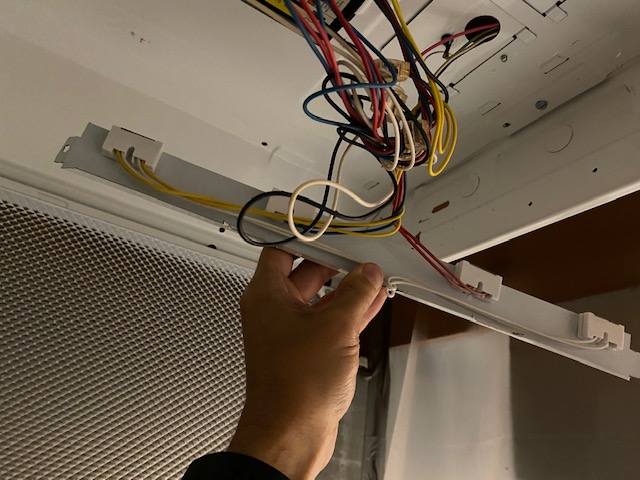
This picture above is super important.
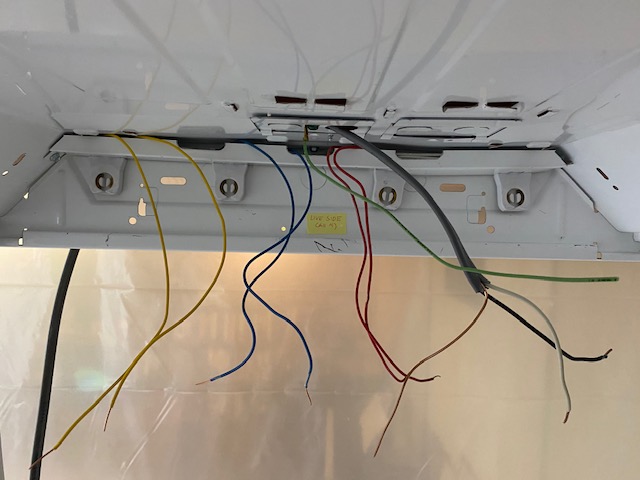
I’ve removed both pin socket assemblies and at this point, I have indeed cut more wiring away. But only after I clarified what was going on, wiring-wise, behind the scenes – and it’s all exposed in this photo.
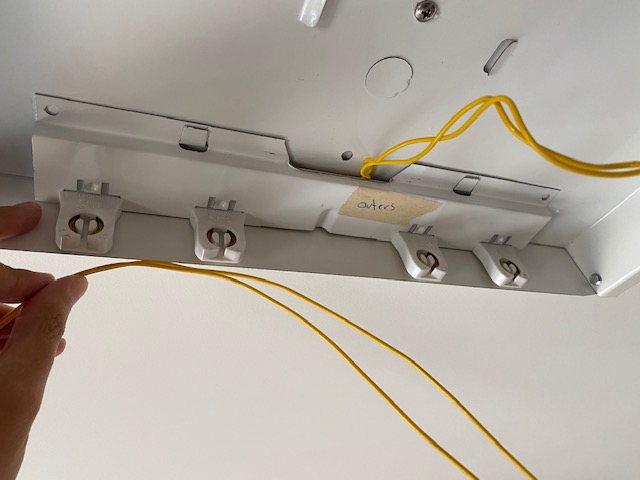
What you can see above is that I’ve decided to use the yellow wiring on the front assembly [by the roll of masking tape] to power the inner 2 pin sockets… whereas I’ll be using the yellow wiring to the other assembly to power the outer 2 pin sockets. And in both cases, this is because the yellow wiring ties right to the white wiring inside the assemblies – and that’s now easy to see.
(But I couldn’t know this without getting a ‘look behind’ the scenes like this.)
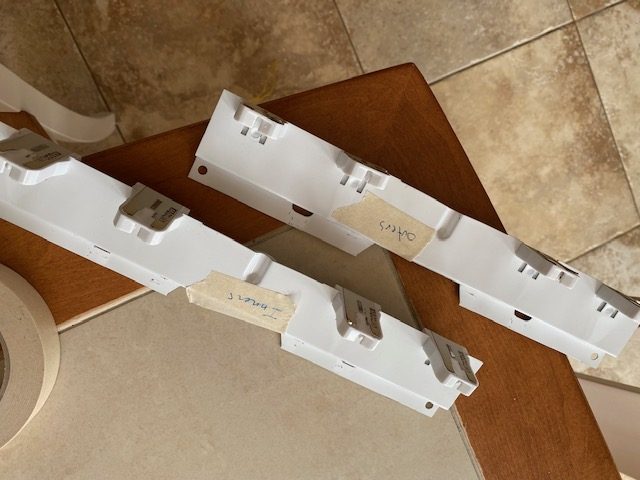
And I’m labeling the assemblies above before ‘snapping them back’ into the fixture, because once they’re back in place it’s the only way to know which is which. (Remember – the bulbs are powered at one end only, so I need to know which end is ‘wired’ to the house AC!)
It sounds more complicated than it is.
But again, a local electrician will have fun with this project if it’s not something for you, so please don’t hesitate there. They’ll knock it right out.
(I’ll show you later in this write up how I opted to wire my basement fixtures a little differently.)
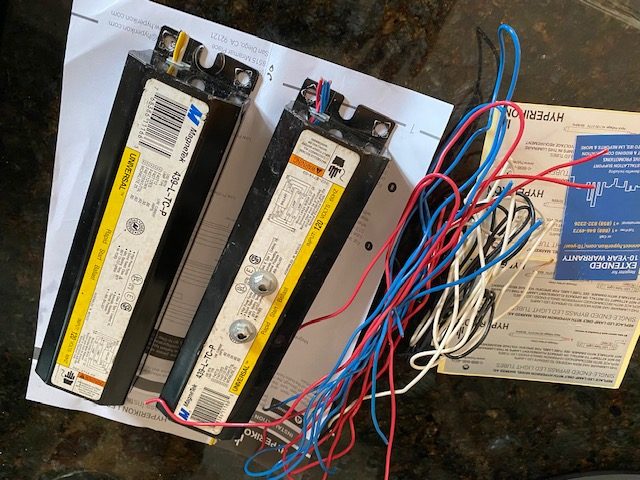
In the above shot – ballasts removed!
Next, I re-install the two pin-socket assemblies with the all-important masking tape labels. Here’s one…
And then, I take one yellow wire from each assembly to the hot (black) line of my house wiring – and the other yellow wire from each to the white (neutral) line.
The fixture is, of course, grounded as well as you can see with the bare ground wire connection. I didn’t need to touch that…
I then snap the wiring cover back into place, and insert my new LED light tubes (I just can’t bring myself to call them bulbs), making sure that the correct [single powered] end is seated into the correct [powered] pin socket.
And we’re good to go, almost…
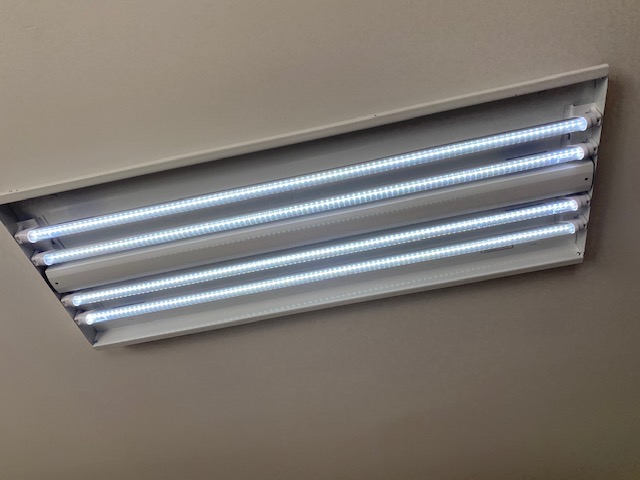
I found, as I mentioned above, the clear lens LED lighting wasn’t quite right for my kitchen.
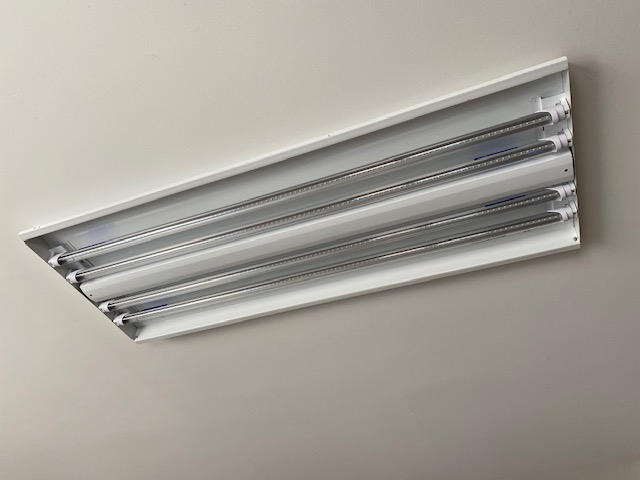
You see the clear lens LED light tubes above. They are SUPER bright, and I found them a little too harsh for the kitchen, so, I swapped these for the frosted lens LED tubes you see below, and I used the clear LED lights for my basement workshop conversion.
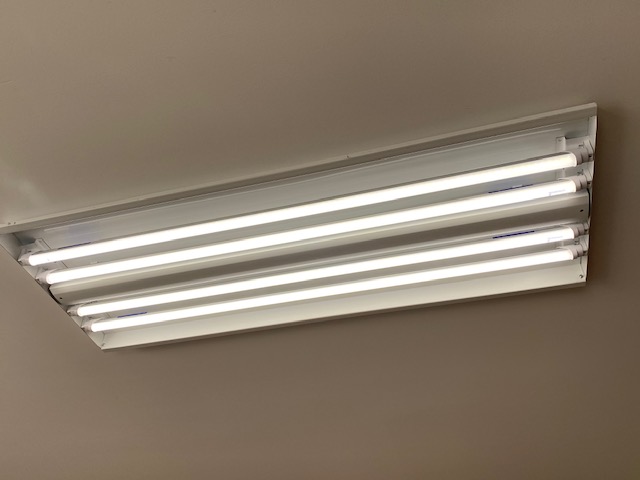
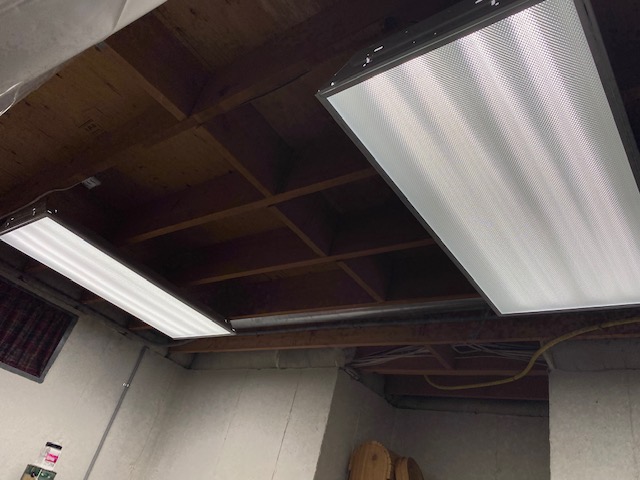
Even above, without adding the fancy exterior of the lighting fixture back into place – that looks better for a kitchen to my eye. The kitchen LED conversion is complete.
LED Lighting for my Workshop Fluorescent Fixtures
It’s the same process, and no doubt – the clear LED light tubes turned out to be great (truly outstanding) in my basement workshop, where I need the lighting as bright as possible.
The wiring, though? I approached it a tiny bit differently.
And that’s the only reason I’m adding this section – to show another example. And why you really must know what exactly is going on behind those pin socket assemblies.
Above is a shot of one of my basement fixtures, looking nearly identical to the kitchen fixture, of course. You can see 2 ballasts. You can see a bunch of wiring to the house power and to each of the two fluorescent bulb pin socket assemblies.
But when I remove the first pin socket assembly, I see this…
Now, in that kitchen fixture – the house power came to the center of the unit. In my basement fixtures, it actually comes to the fixtures (both of them) at one end. The top right of the photo above. Now, given this slightly different geometry, I decided to use only one pin socket assembly – the one closest to the house power. The one you see above.
And now, in a bit more detail, below…
The gray wire (Romex) comes into the fixture as the house power from a nearby junction box.
And when I electrically connect everything here, there are a few more wires to deal with under the wire nuts… but all LED light tubes will now be powered (via standard house AC – no ballasts) from one side.
And once more – good to go!
If it wasn’t for all the arms-over-the-head working on the top of a ladder in sub-optimal lighting (aka; the dark), this was actually a fun couple of hours. Plus, these LED lights are more efficient and fundamentally simpler and safer (no internal mercury) as compared to fluorescent bulbs.
And have I mentioned, the LED bubs don’t require ballasts? ;)
I’m in for the long term now. LED Lighting.
In fact, we converted the landscape lights last year as well, but that’s another story entirely.
Need Professional Help from a Local Electrician?
• Visit Our Find a Contractor Page
Related Posts
• How to Replace a Ceiling Fan
• My Wireless Waterproof Doorbell Epiphany
• Installing a Bathroom Ventilation Fan
• How to Replace a Dead GFCI Outlet
• Troubleshooting and Repairing a Broken Doorbell
• How To Repair a Leaky Basement Wall

A wiring diagram would be more helpful to show how the pins are wired.
Each manufacturer’s product will provide a wiring diagram, James – and that’s critical no doubt. But beyond that – the configuration of your existing fixtures is something you need to almost ‘reverse engineer’ a bit as I was showing above. (Note how my kitchen fixtures were different from my basement fixtures, just a touch.) So, it’s a little bit fun… in that’s it’s a little bit like a puzzle. You’re trying to leverage your past fluorescent fixtures with an LED retrofit – and you can. But you have to determine how they’re wired first. And as for your LED ‘bulbs’ – your manufacturer will provide a wiring diagram, as I mentioned above, and these will also vary depending on whether you choose to use the ballasts or choose to bypass the ballasts, as I did. In short… there’s some variation on a few fronts!