My DIY powder room rehab took time out of every weekend over the past 4+ months, and I think it came out great. (Far better than I expected, actually!)
Imported beveled subway tile halfway up the walls, topped with a mitered glazed ceramic chair rail. A colorful, but not overwhelming, floor tile from Spain – giving us hues of blue/gray and gold for decorating flexibility.
A deep blue (and particularly striking, IMHO) vanity, which was focal to the entire room. Intentional mixed metals for décor, which was a risk – but again, I think worked out beautifully: note the silver and bronze pieces and accents in the ‘after’ portion of the photo just below.
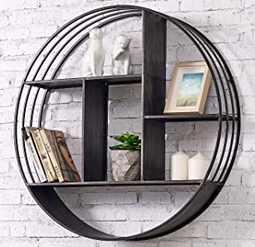
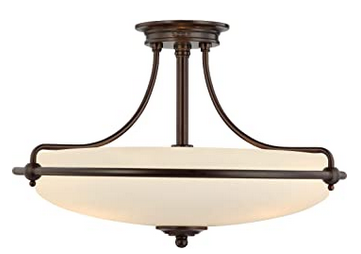
And I especially loved our LED ceiling light fixture and the circular wall display, both of which were discovered by my wife. She’s excellent with the decorating nuances…
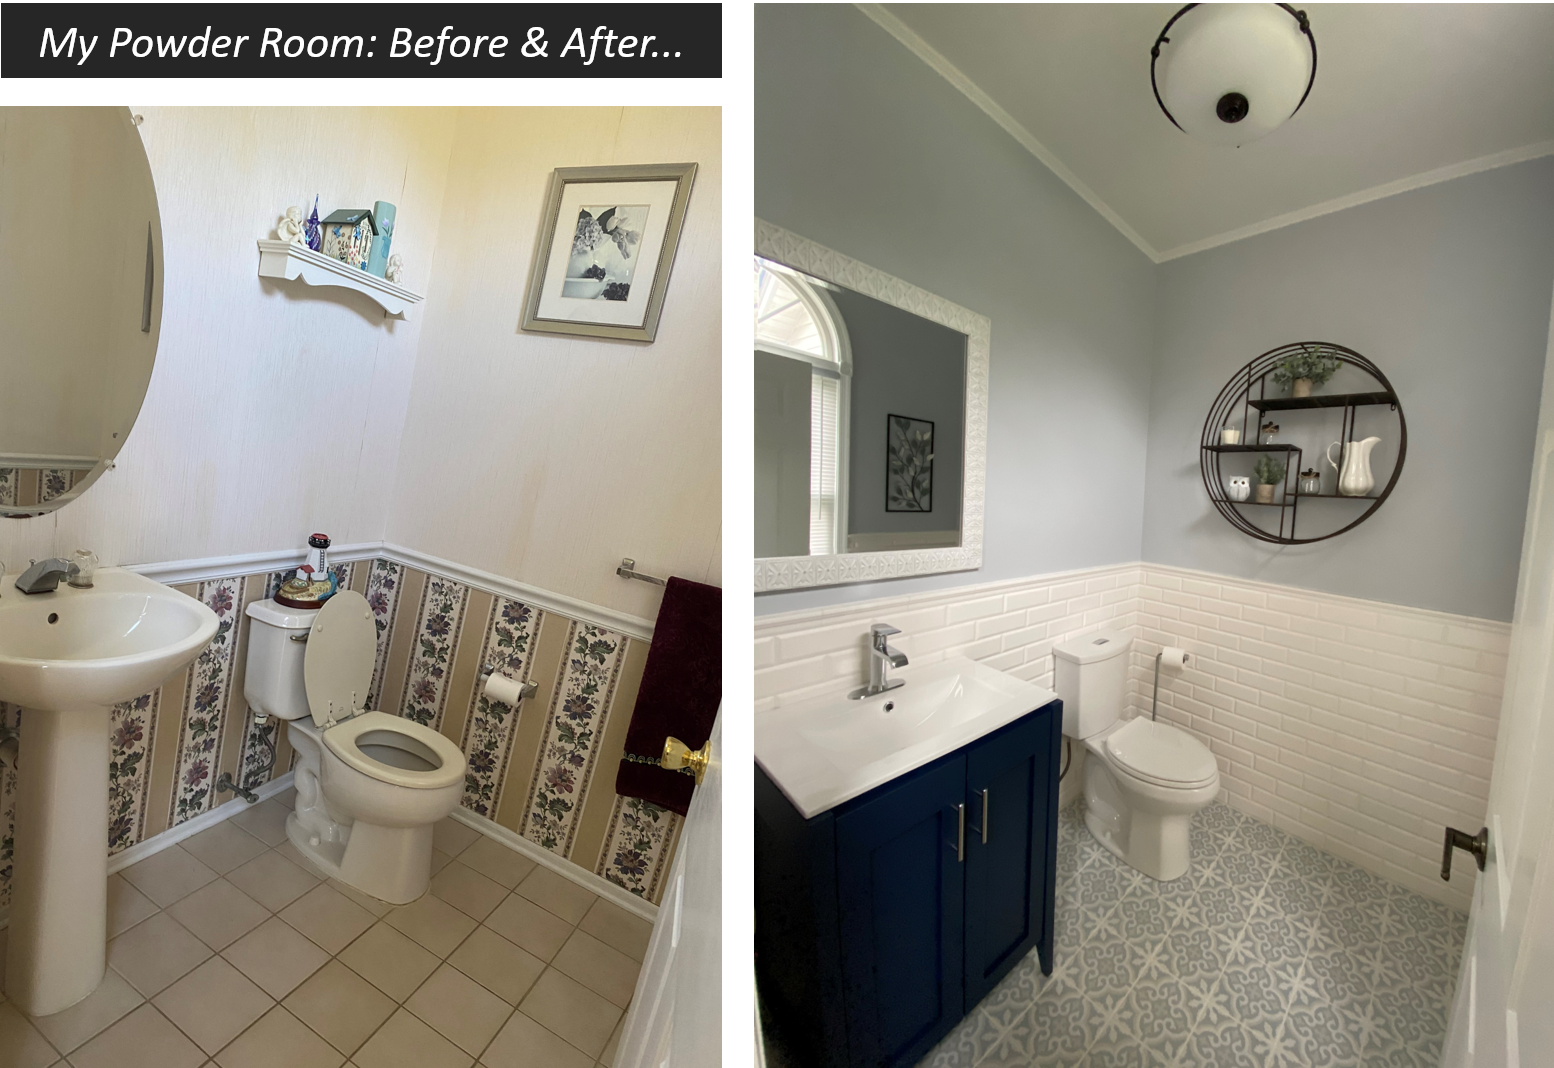
But judge for yourself – this is all subjective, of course.
In the end, the circular metallic wall display and décor may have actually stolen the focus of the room…
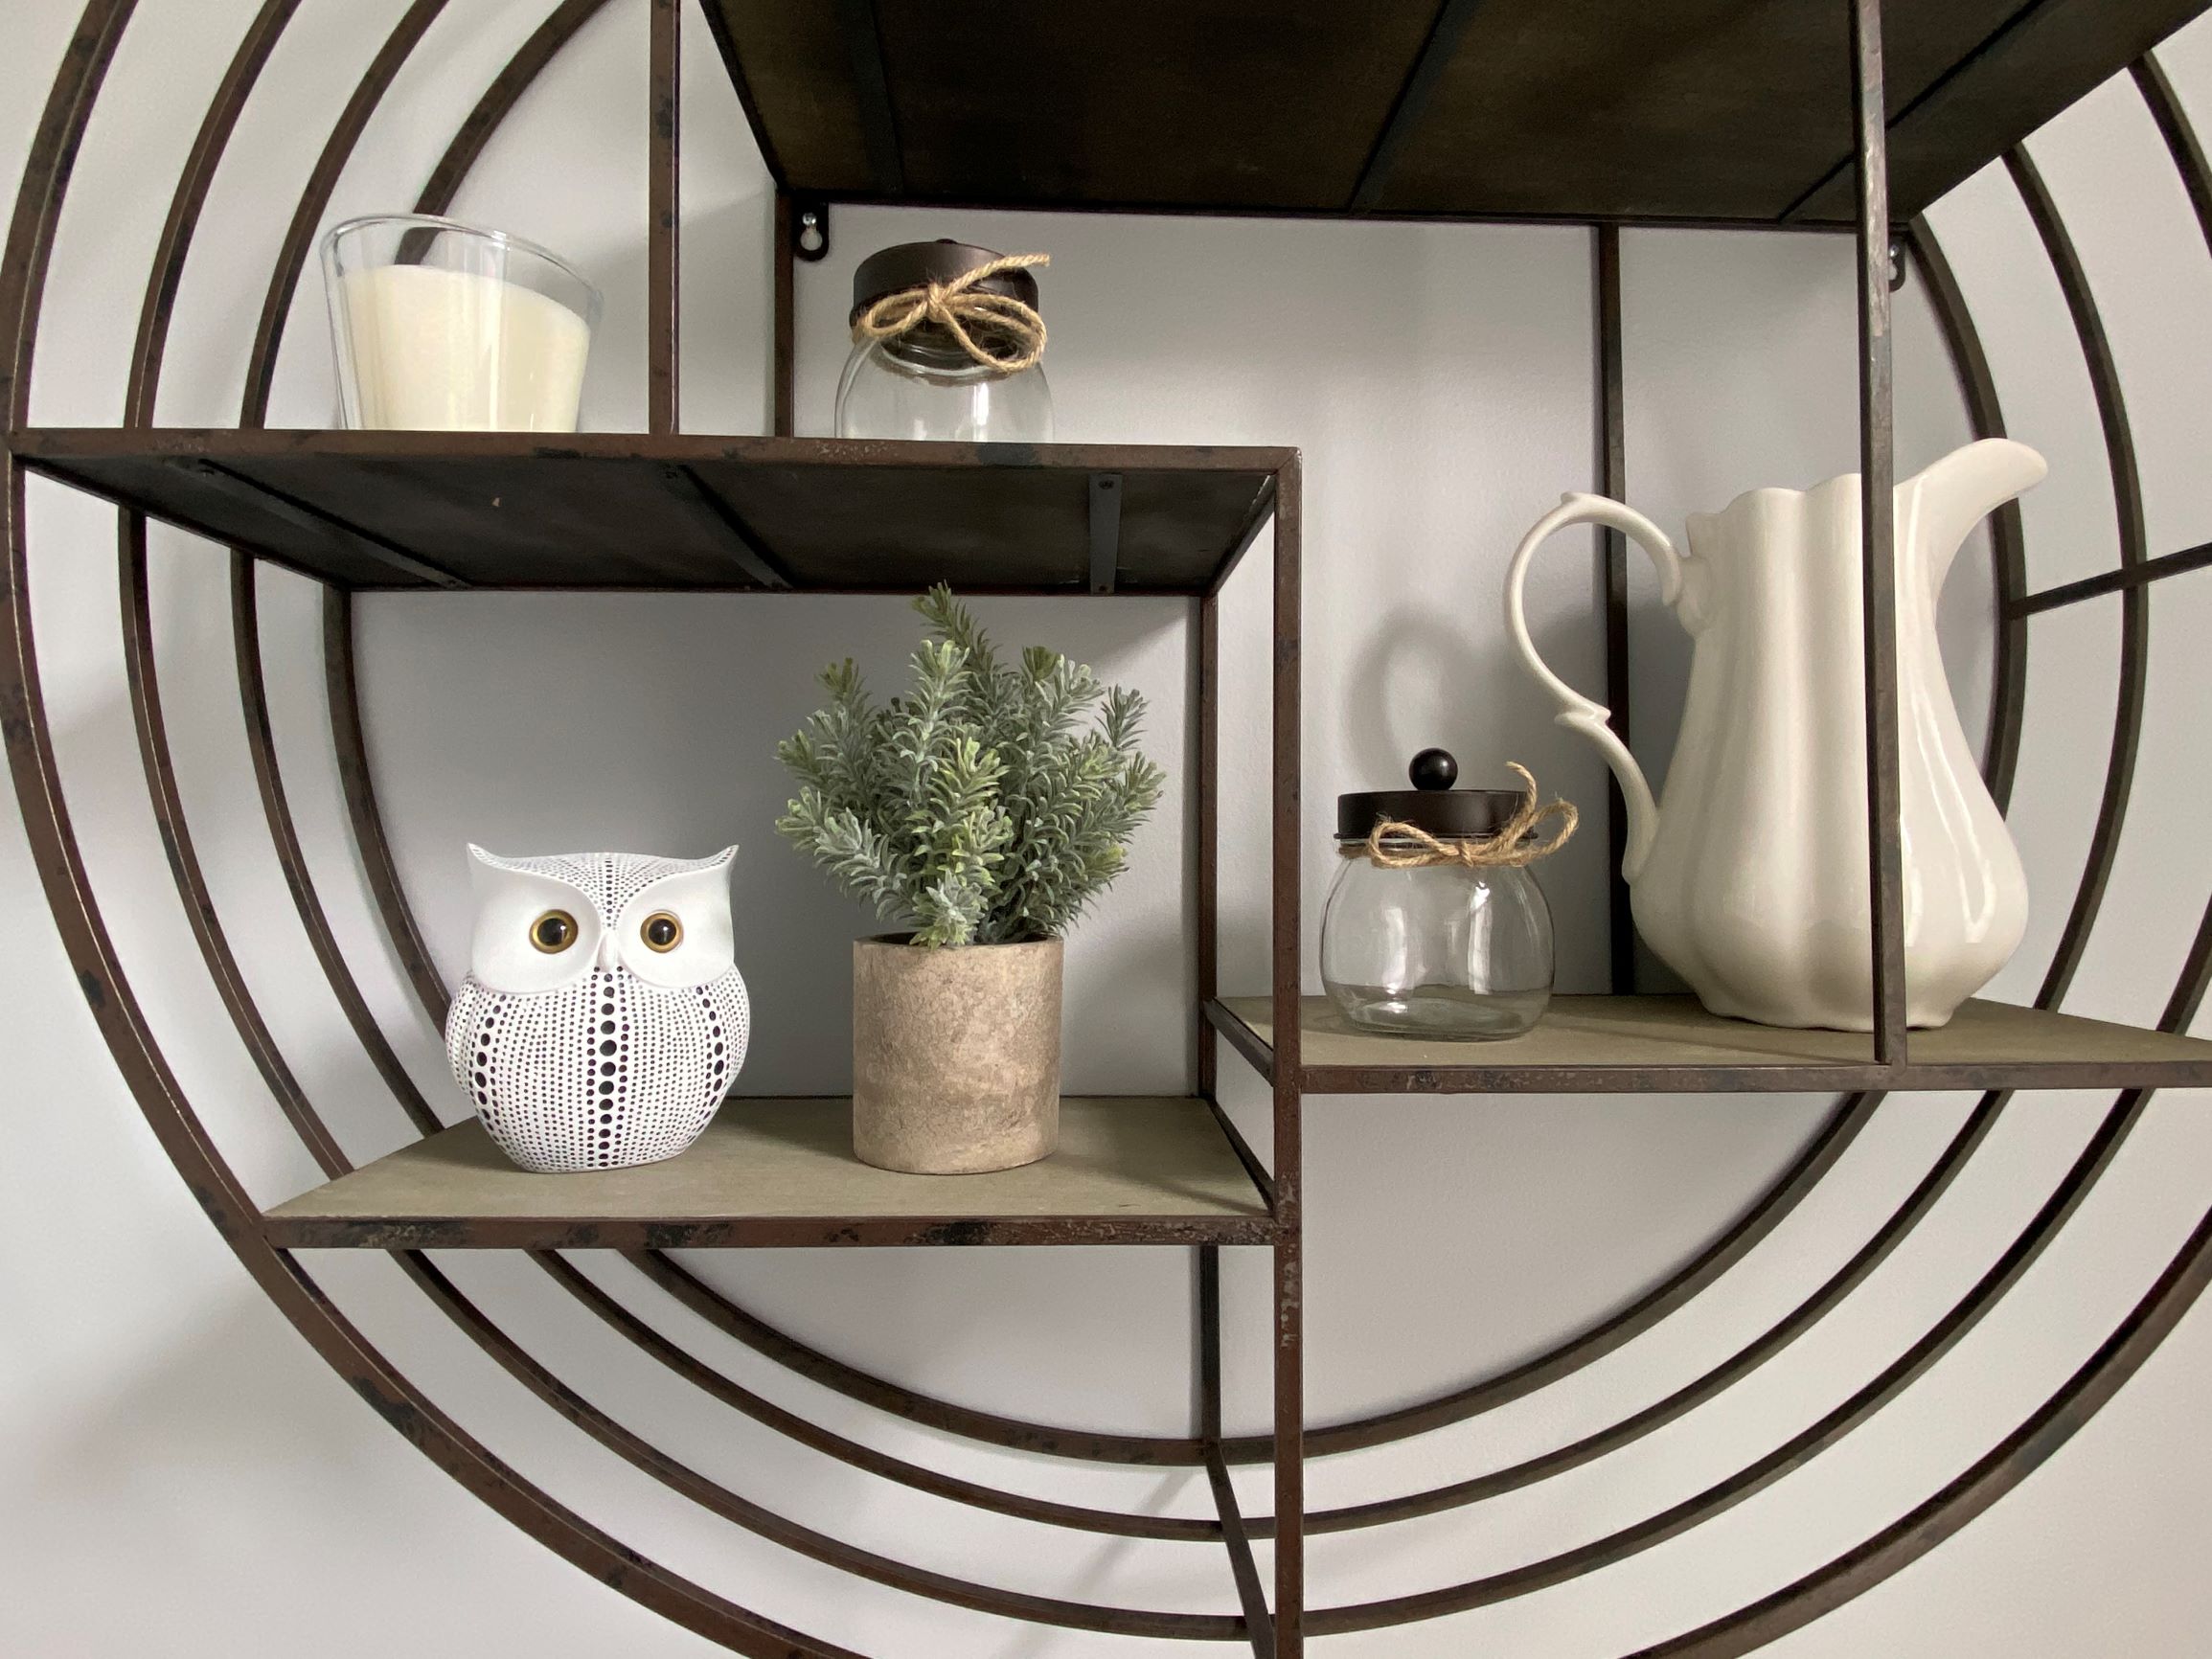
Or maybe just that white owl?
Below, I’ll share lots of photos and at least one video I put up on YouTube. I’ll lay out some of the key design, construction, and decorating steps – and give the overall feel for what this entailed.
I’d frankly call this project somewhat advanced. Some parts were pretty gritty…
But it’s TOTALLY doable if you have the time and tenacity. (And if grouting doesn’t make you want to kill yourself a little bit… as it does for me!) I’ll share some key Amazon links too – for tools, materials and design nuances we leveraged. And hopefully you find some of this inspiring and helpful.

I’d ask that as you skim or read through this, please offer your own personal thoughts, suggestions and experiences – and don’t hesitate to ask any/all questions via the comment form at the very bottom!!
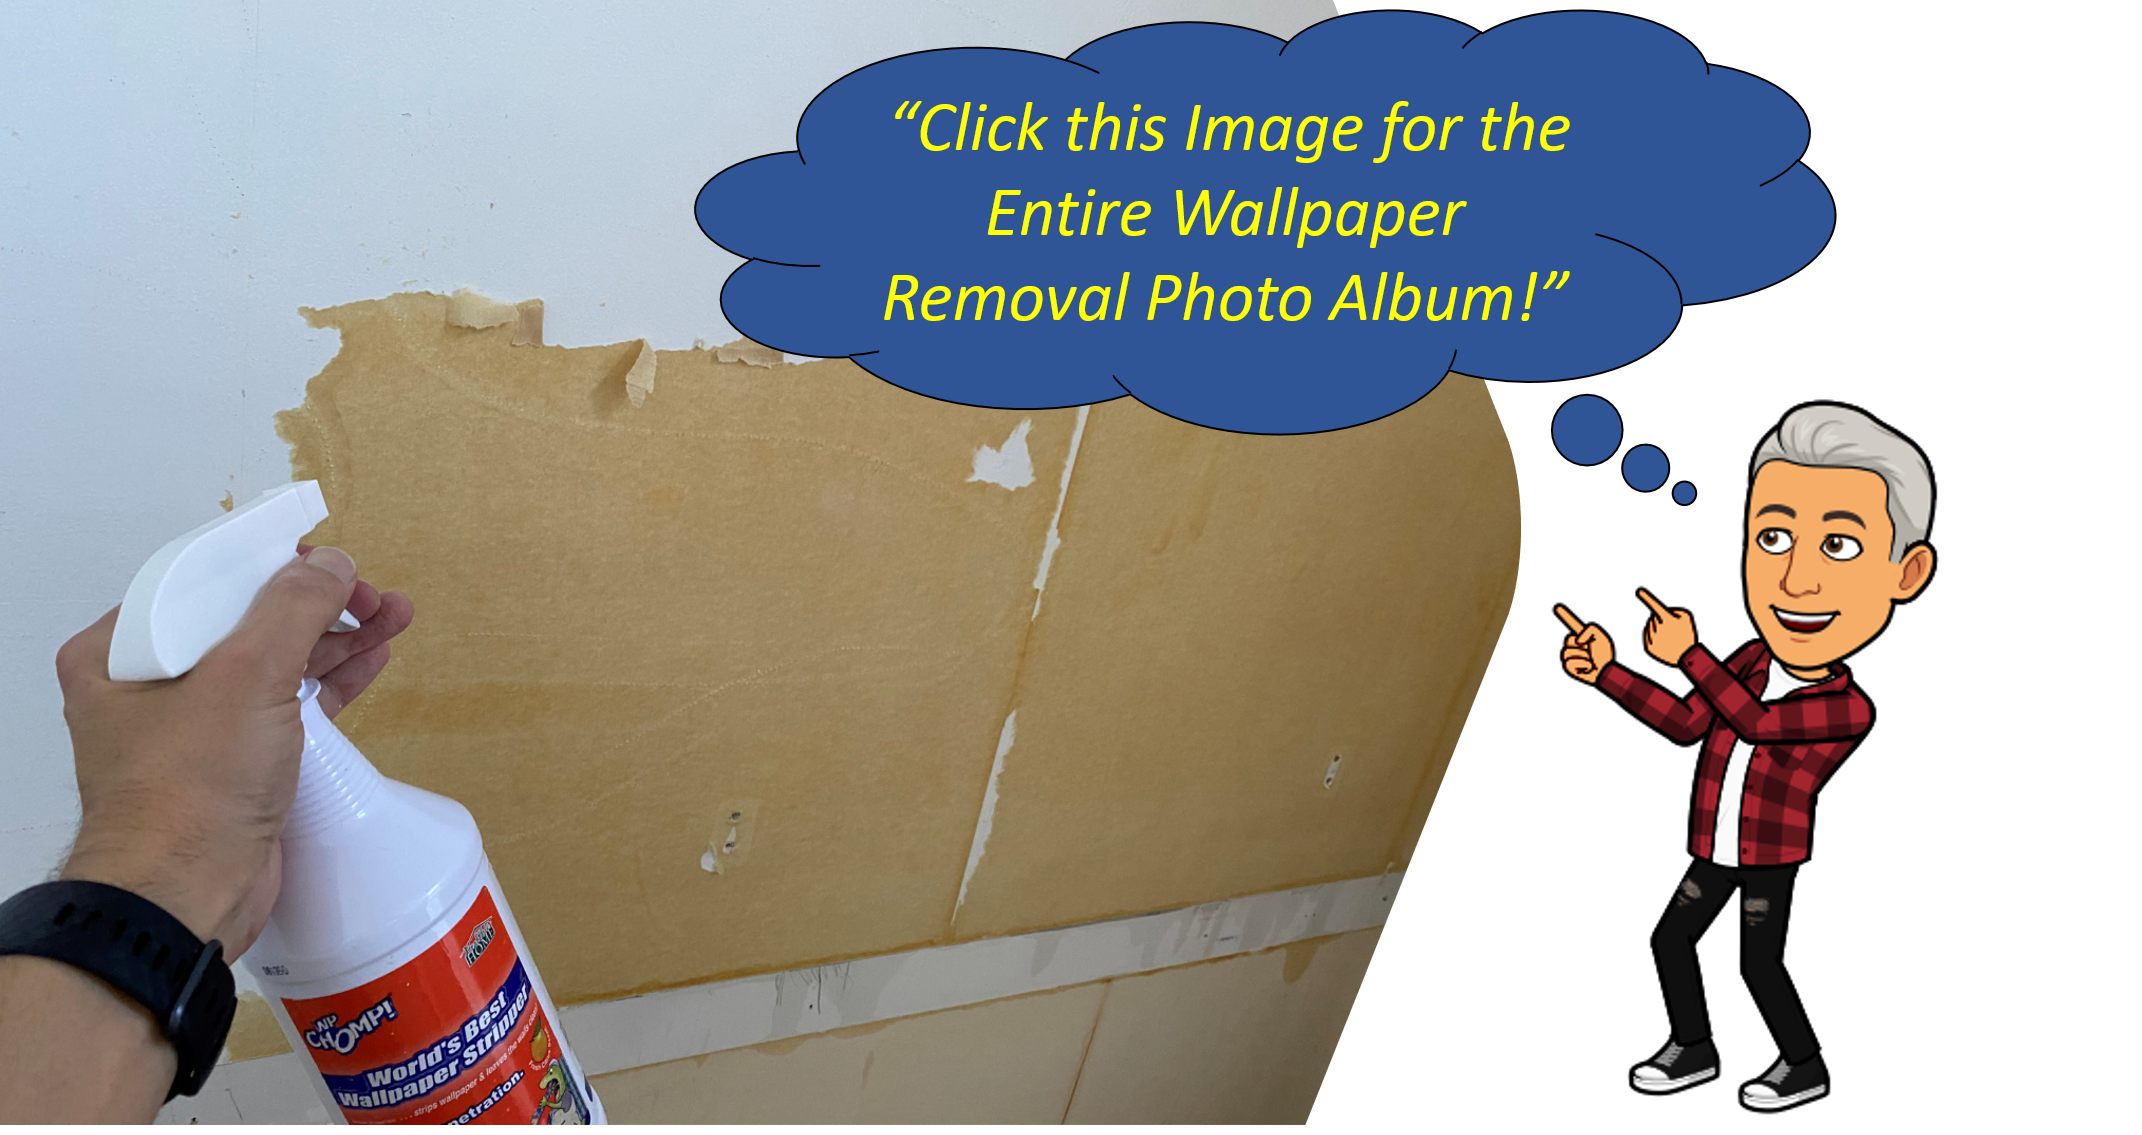
For now, though – let’s start with a few words on the ‘joy’ of wallpaper removal…
Wallpaper Removal or Drywall Replacement?
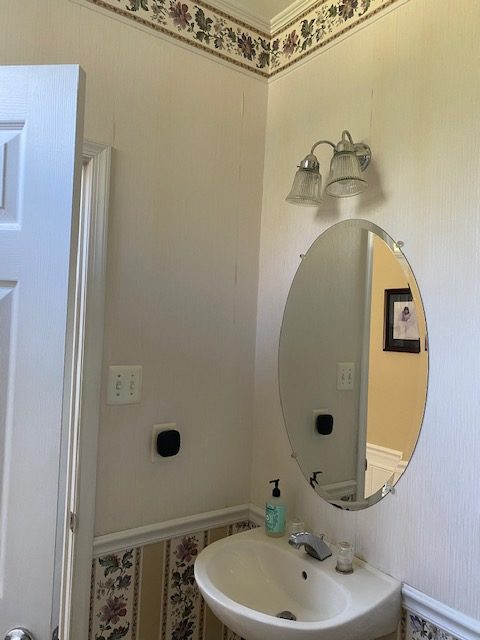
As you can see from another ‘before’ picture just below, my younger self went-to-town with wallpaper in this bathroom nearly 20 years ago. And on that front, I wasn’t too thrilled with him when I started this project. He was wise enough to seal the walls with an oil-based primer before wallpapering though, so I gotta give him props for that.
Oil-based primer under the wallpaper made this part of my powder room rehab much more pleasant.
Below is a video that shows the whole process. It’s a bit boring. UNLESS you have to do this yourself… in which case, you may possibly just find it: Awesome!! (Boringly awesome?)
Wallpaper Removal Tool/Material List:
• Wallpaper Stripping Fluid
• 2-Gallon Sprayer (like the one I used in the video to make things go SO MUCH faster.)
• White Vinegar (also I also mention in the video above. Was super effective for me. And cheap!)
• A Wallpaper Scoring Tool (to get off the very top layer of wallpaper)
• A Wallpaper Scraper Tool (for removing the paper under the top layer, after saturating with stripper)
Powder Room Ceiling Carpentry & Electrical
I started at the top of the room for one simple reason – things fall to the ground. Screws, paint drips, joint compound splatters, me-off-the-ladder (if I’m not careful enough) – so best to start at the top and, where practical, work my way generally downward.
The original bathroom ventilation fan was old, the cover had yellowed – and worst of all, to me: it was never centered…
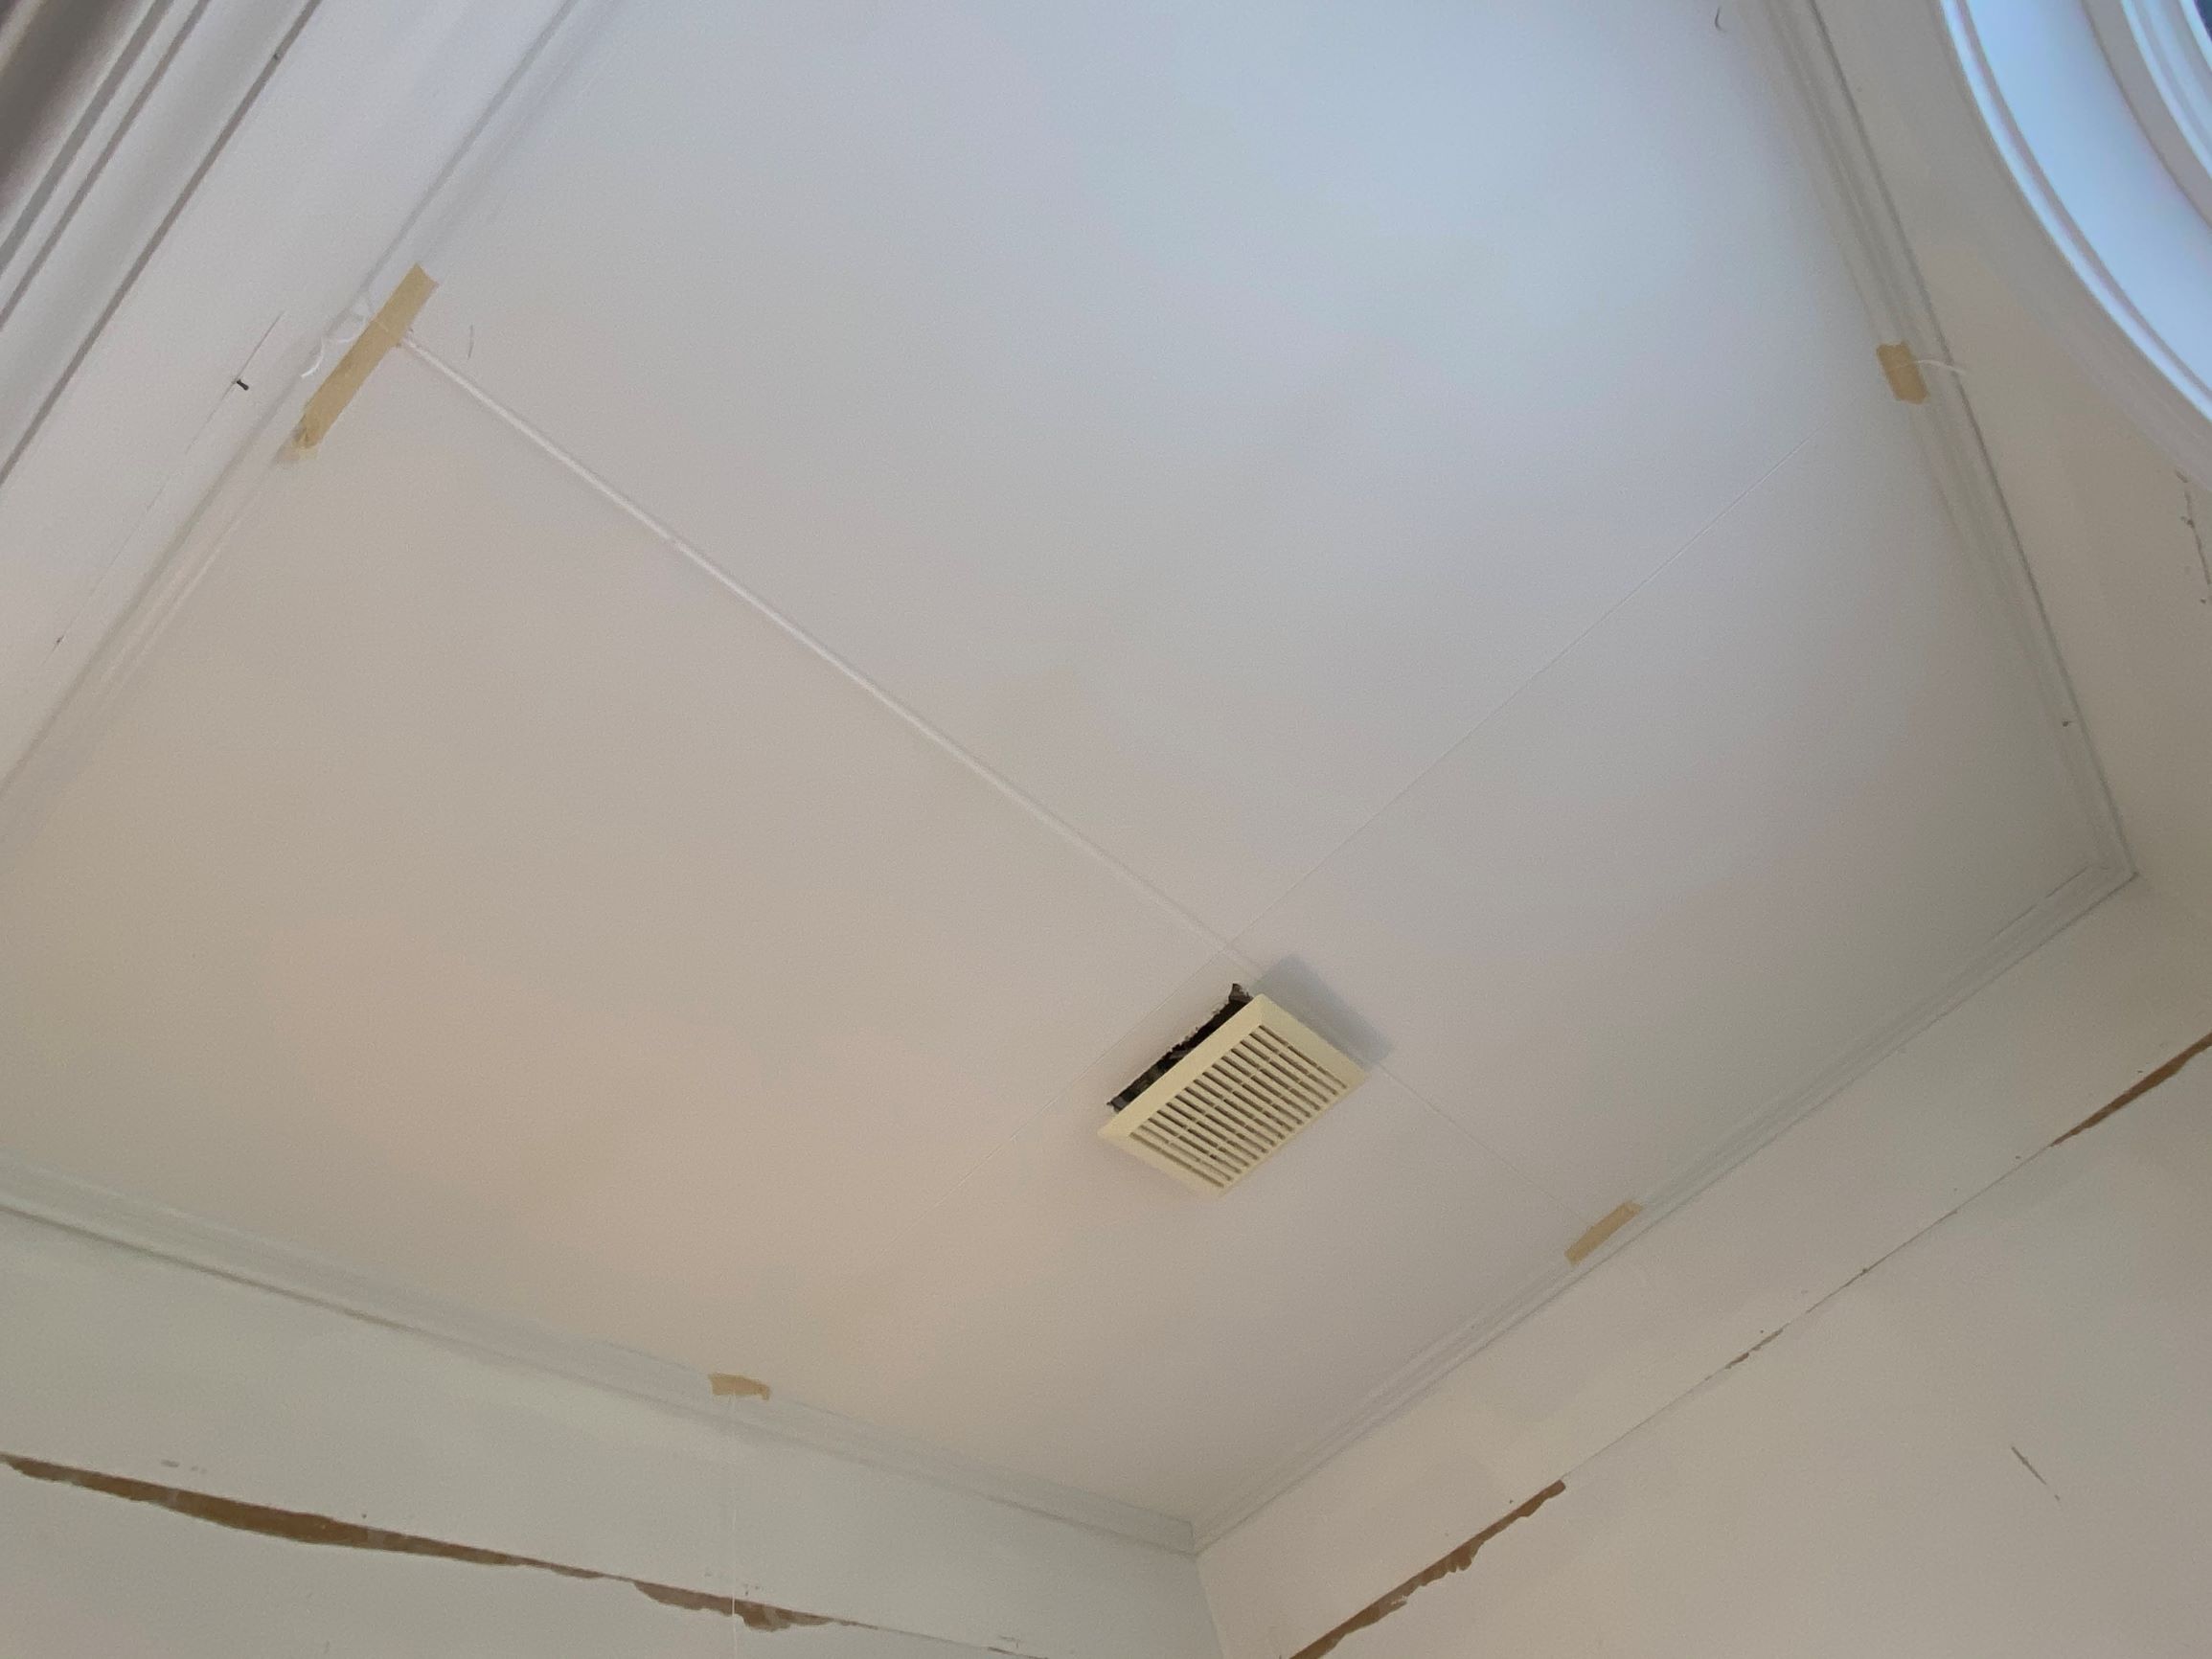
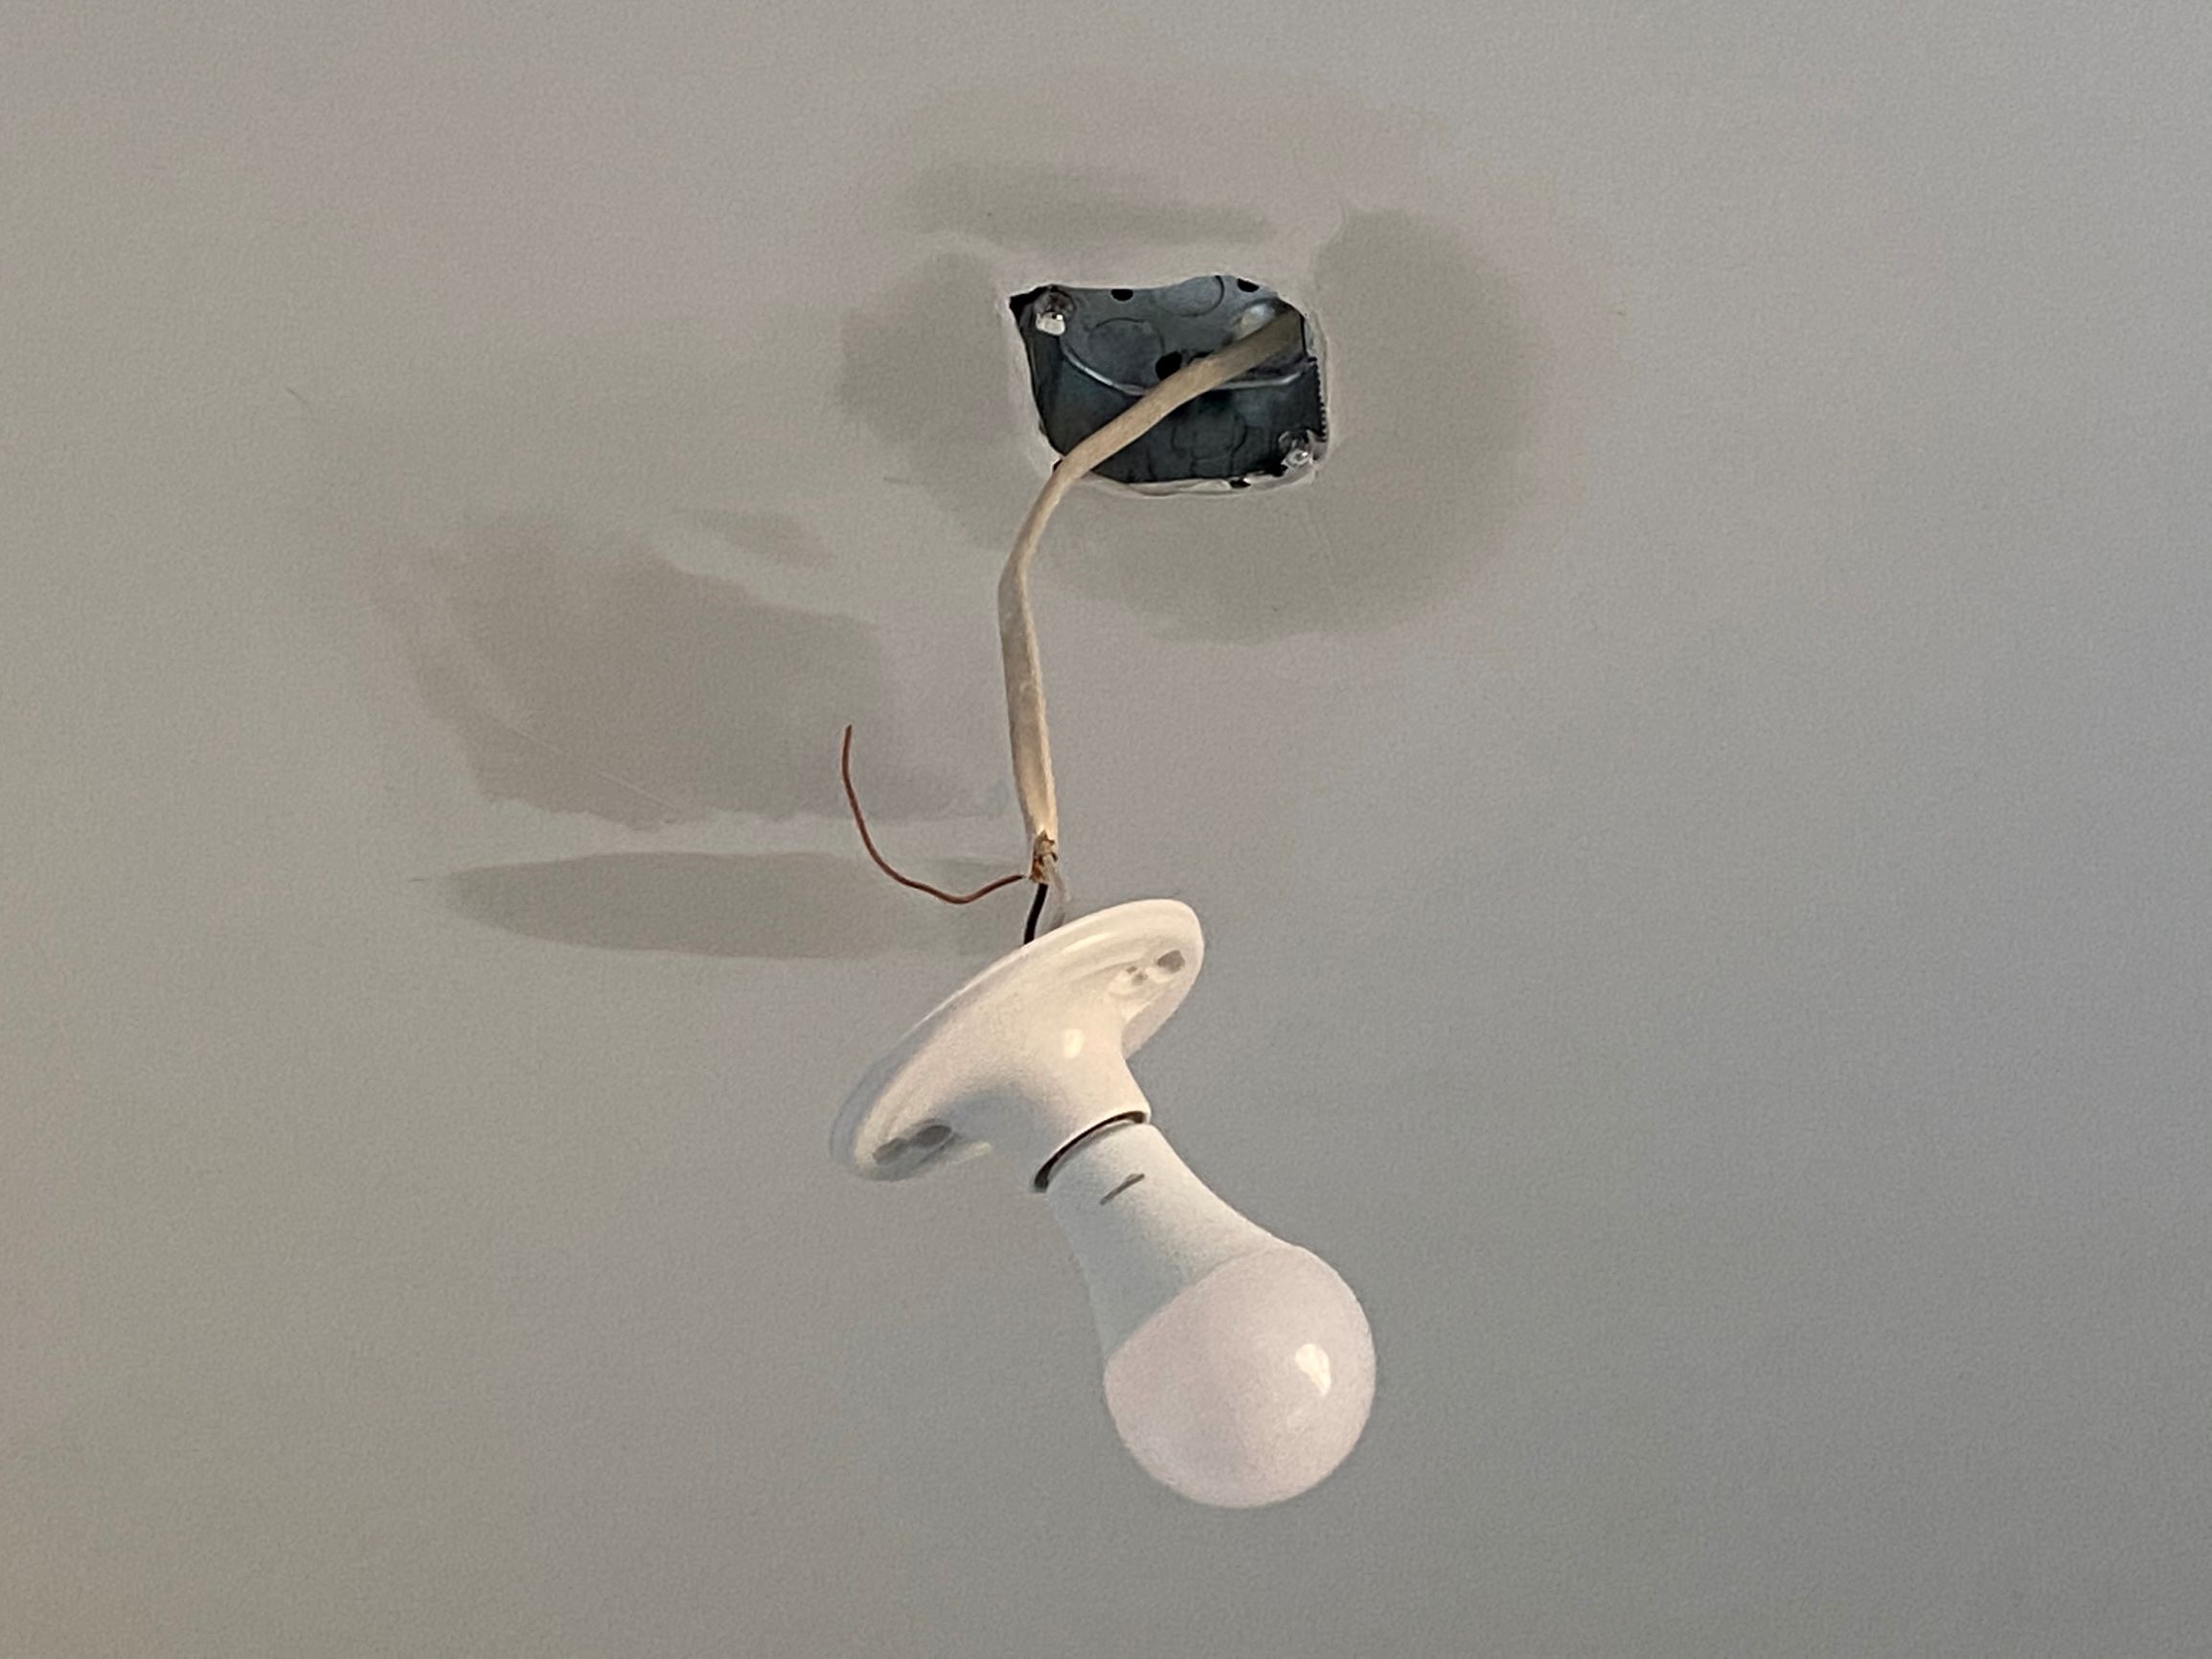
So, I wanted to rip that out and install a room-centered electrical junction box for a brand new LED light fixture.
Below, you’ll see me finding the ceiling center point and starting to rip out the old ventilation fan.

KEY NOTE: The electricity was, of course, OFF for this – and for every electrical step and photo you see below.
ANOTHER KEY NOTE: If you’re not 100% comfortable with electrical work – bring in a local, reputable professional electrician to help.
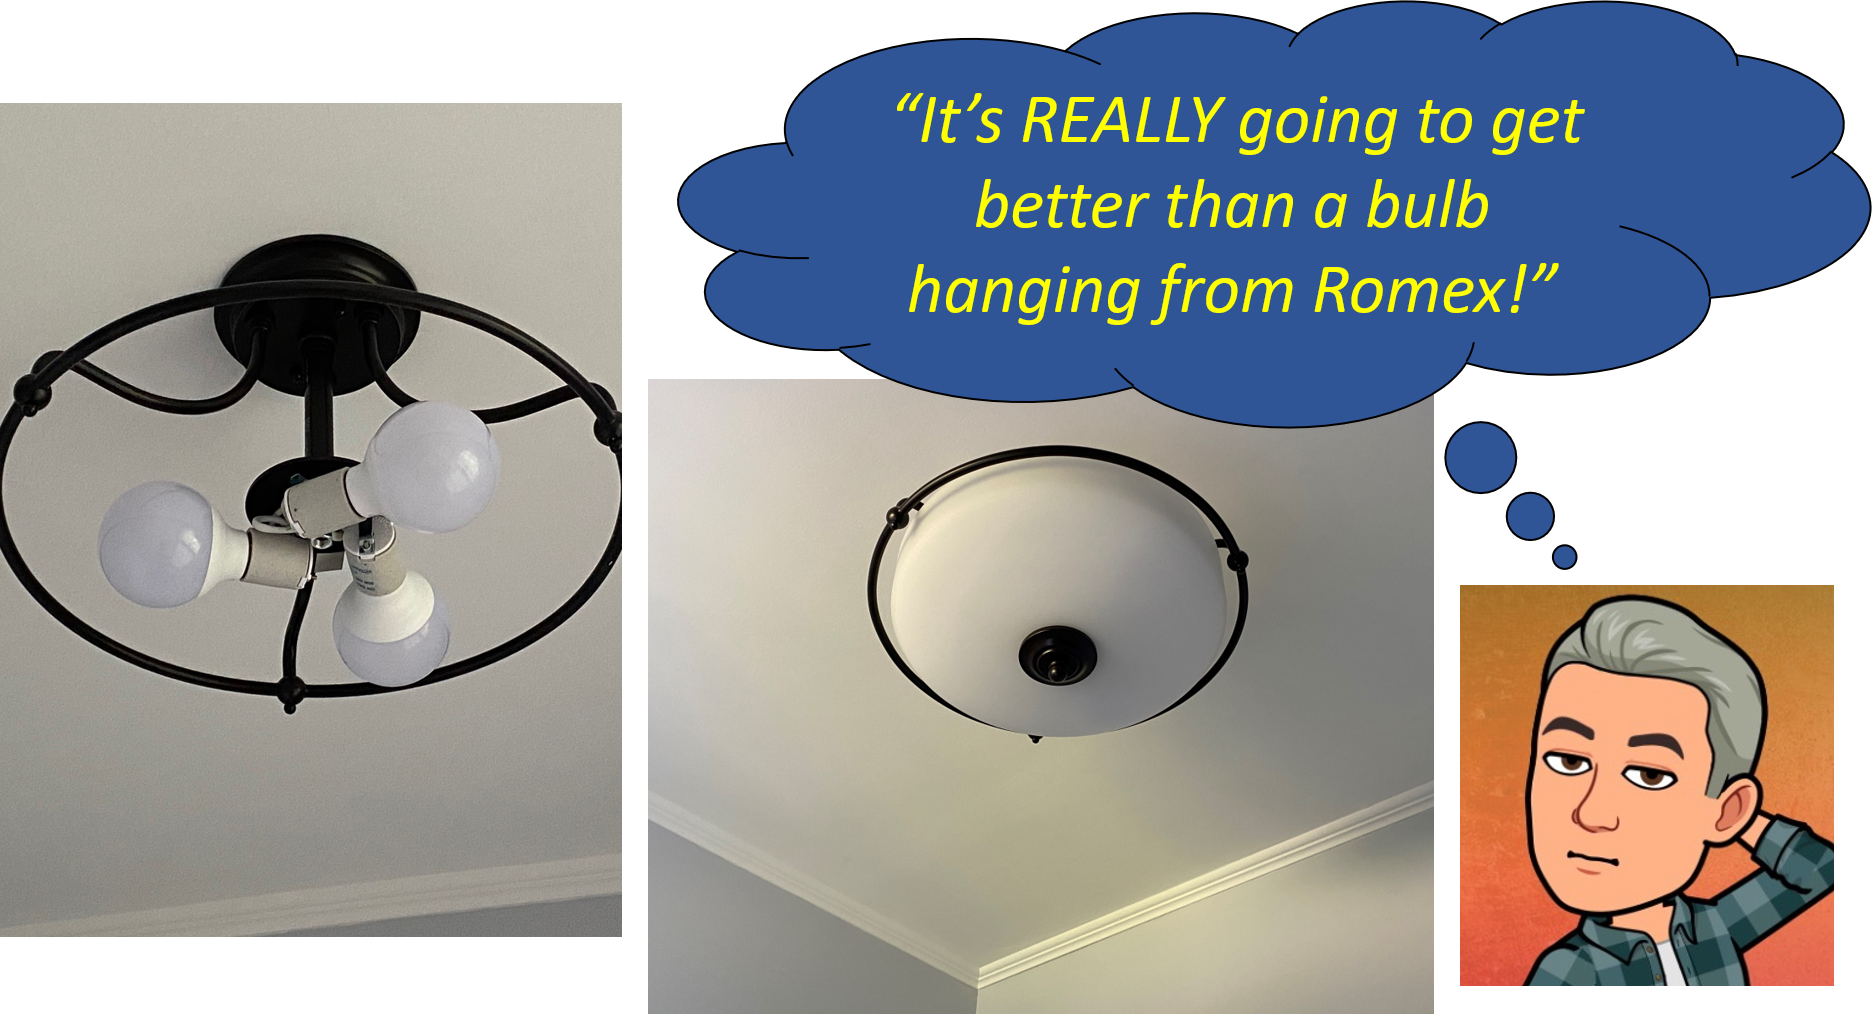
I took the existing Romex (electrical cable) from the old ventilation fan and ran it to a new electrical junction box that I installed in the properly-centered area of the ceiling – and installed that super-cool “light bulb” you see below as temporary construction lighting.
The fixture the bulb screws into? I got that for $1.80 + tax. Nice!

Then, I drywall-patch the areas of the ceiling I messed with – getting it ready for a couple of coats of brand-new white ceiling paint.
Looking pretty cool now, right? (No. No it’s not, I know. Not yet, anyway.)
But… it’s going to get better!!
More Bathroom Electrical Work
Now, with big plans for our beautiful new LED light fixture, I’m going to redo the electrical work in the walls because my original bathroom had sconce-type lighting over a pedestal sink.
And those old lights just below – must GO.
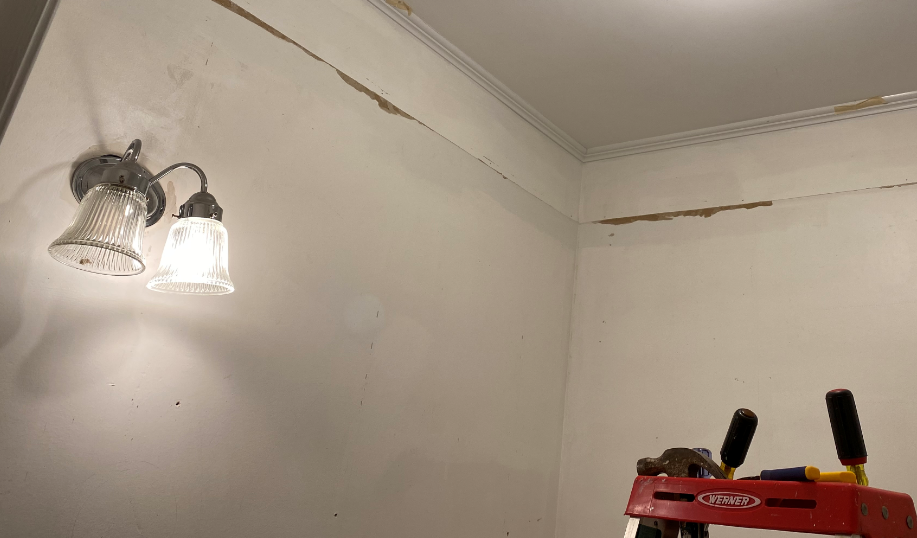
So, I rip that fixture out and redo not-only the switch in the wall (now controlling the “ventilation fan to new light bulb” Romex) – but I also reposition a GFCI [Ground Fault Circuit Interrupting] outlet into the same junction box as well.
This leaves me with two holes to patch in my walls – but I now have one switch and one electrical outlet consolidated nicely, right as you walk into the bathroom…

And as for fixing holes like these in the walls? No problem!
These are easier than the larger patch I had to do for that ventilation fan I ripped out. (Did you notice the 2 strips of backing scrap wood I installed there a few photos up? That was so I could screw a custom-cut piece of drywall into that larger ceiling hole.)
For the smaller holes, though?
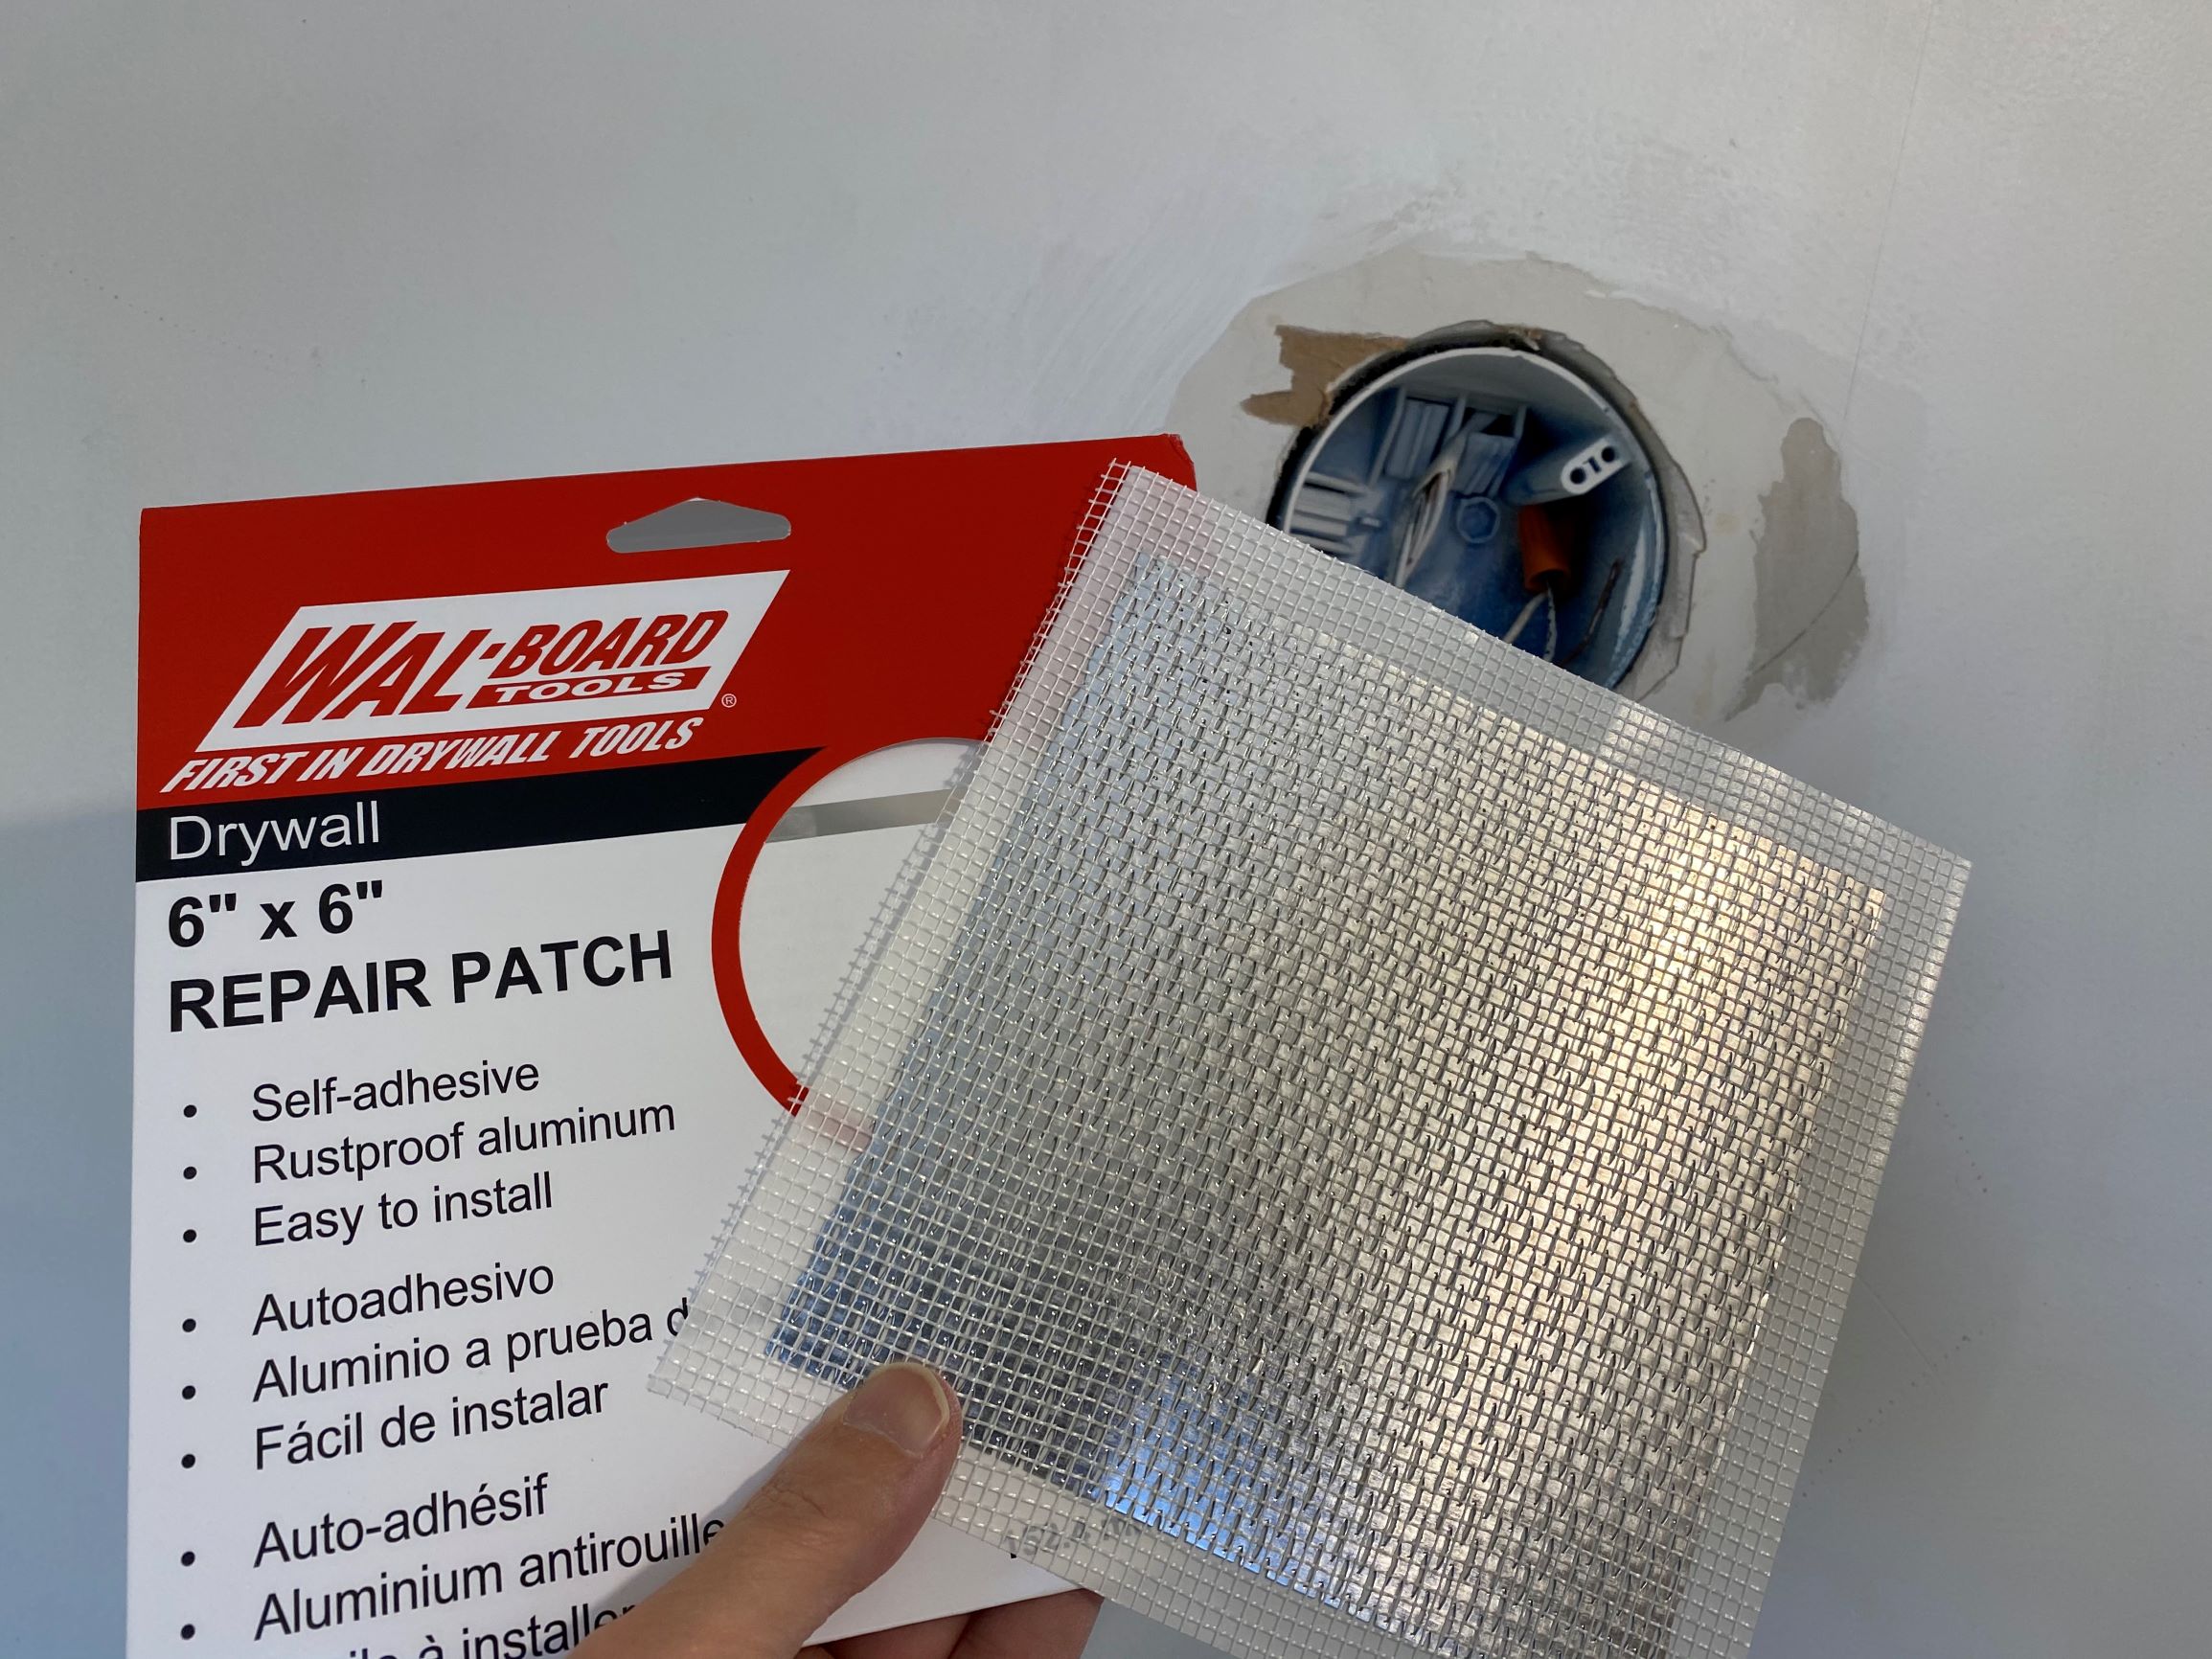
You need one of the drywall patch kits you see above, some joint compound, a little sandpaper, a damp sponge – and some patience, as it can be a little tedious getting the wall truly ready (smooth enough) for paint!
I’ll list everything I used on this below.

Stuff I used for the Electrical Work & Wall Patching
• A razor knife – have a brand-new blade
• A wire stripper and cutter, of course. And some screwdrivers, too.
• A new electrical junction box for the ceiling fixture. (Use metal, not plastic.)
• A new GFCI outlet – and a brand new light switch too.
• Drywall patch kits for the small wall holes
• A custom-cut piece of scrap drywall for the larger ceiling hole
• Joint compound
• Adhesive fiberglass drywall tape (I love working with this.)
• A pristine joint knife set (Don’t mess around here: meticulously clean knives)
• Some 220-grit sandpaper sheets
• Some new, clean sponges to dampen for the for the final “sanding” (Use only the soft side.)
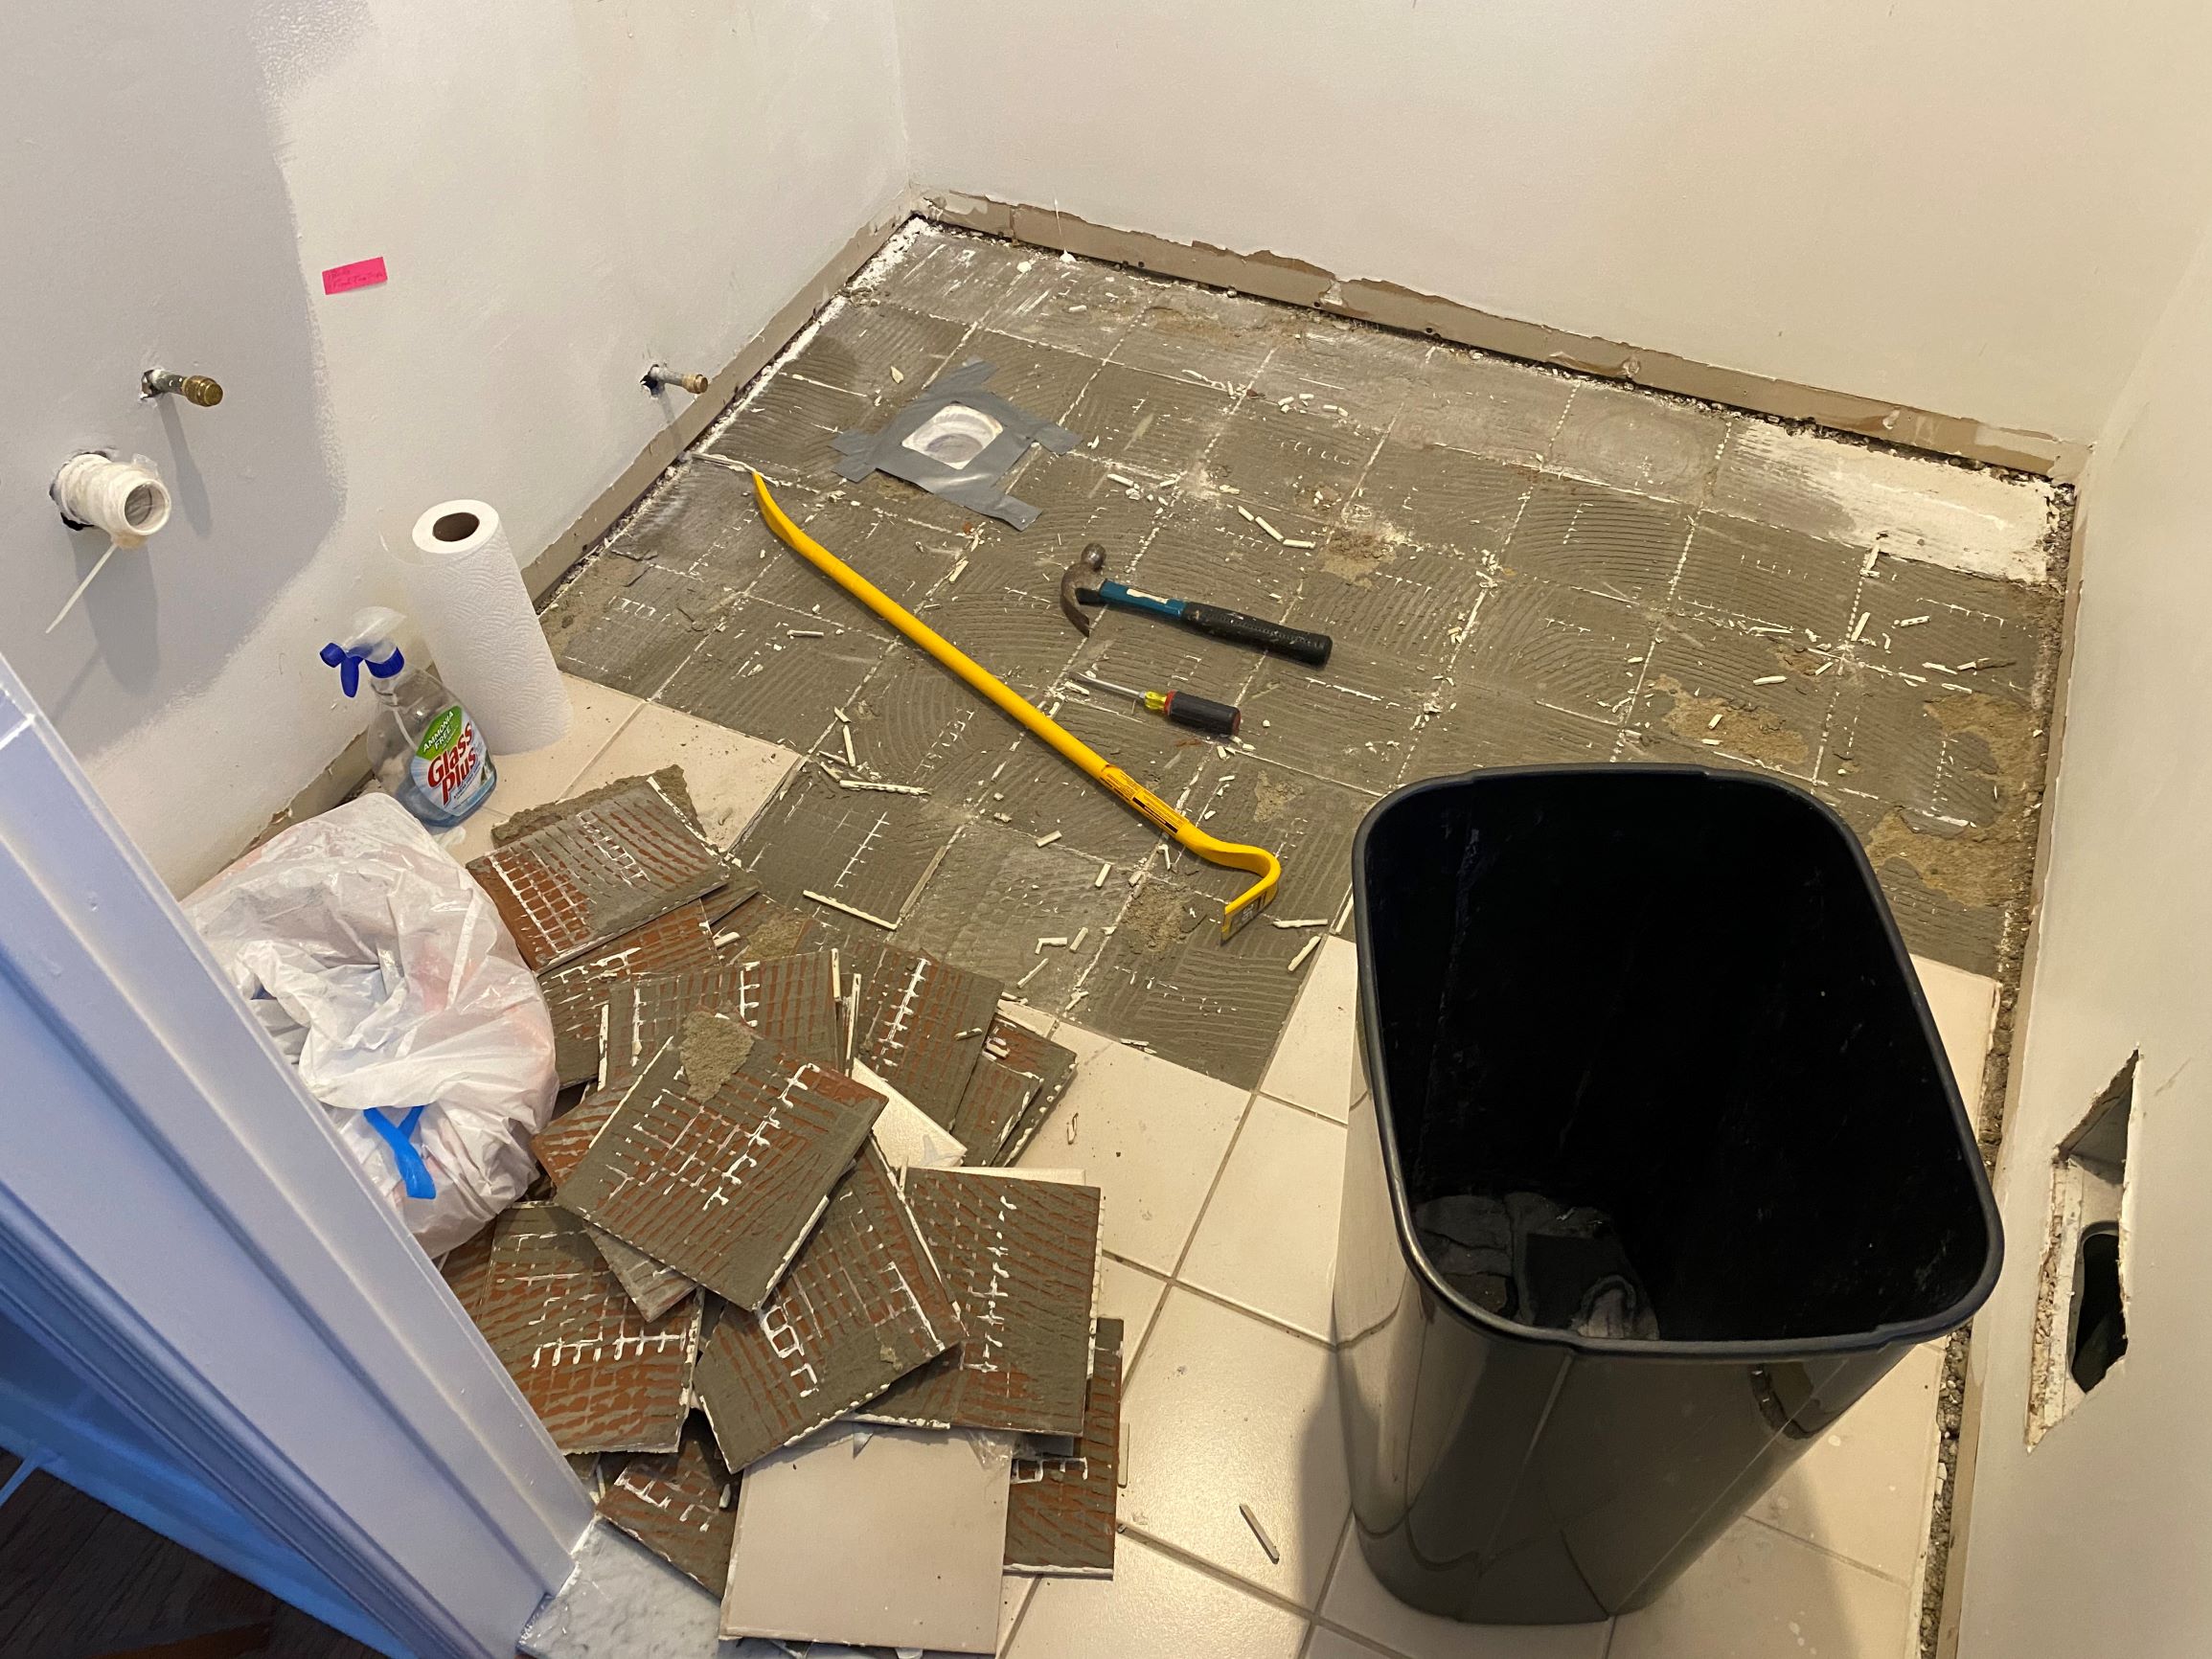
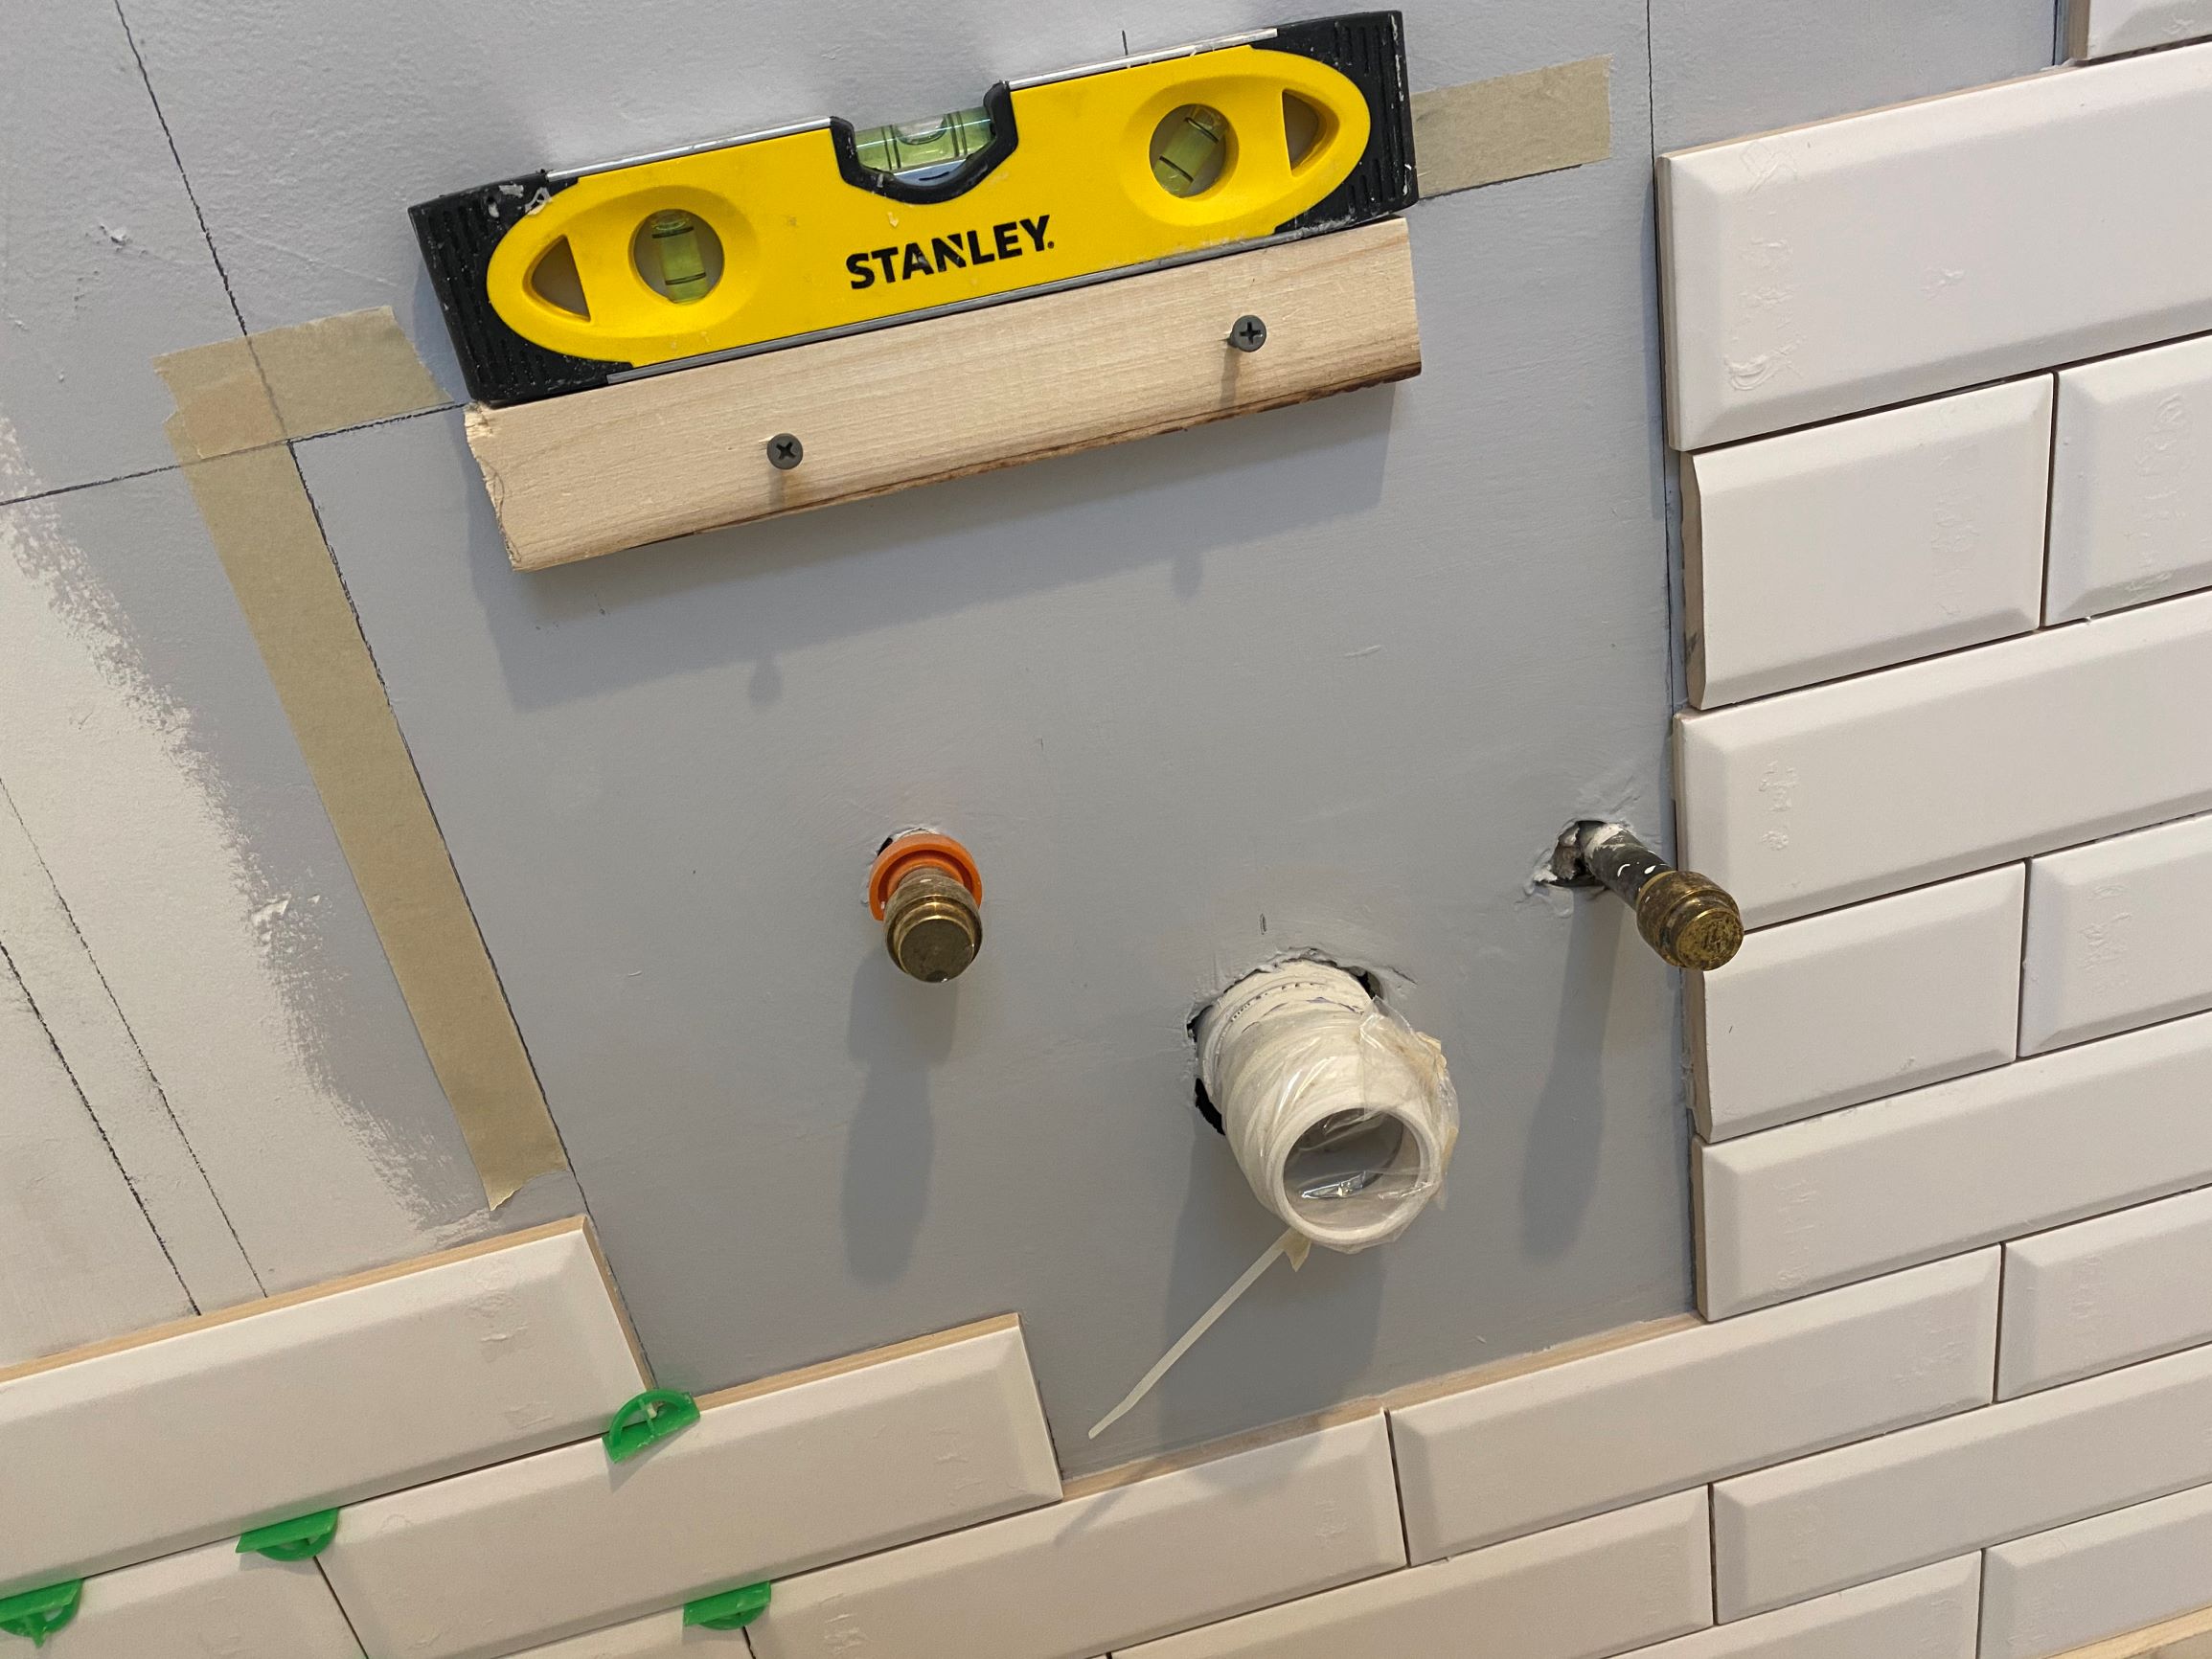
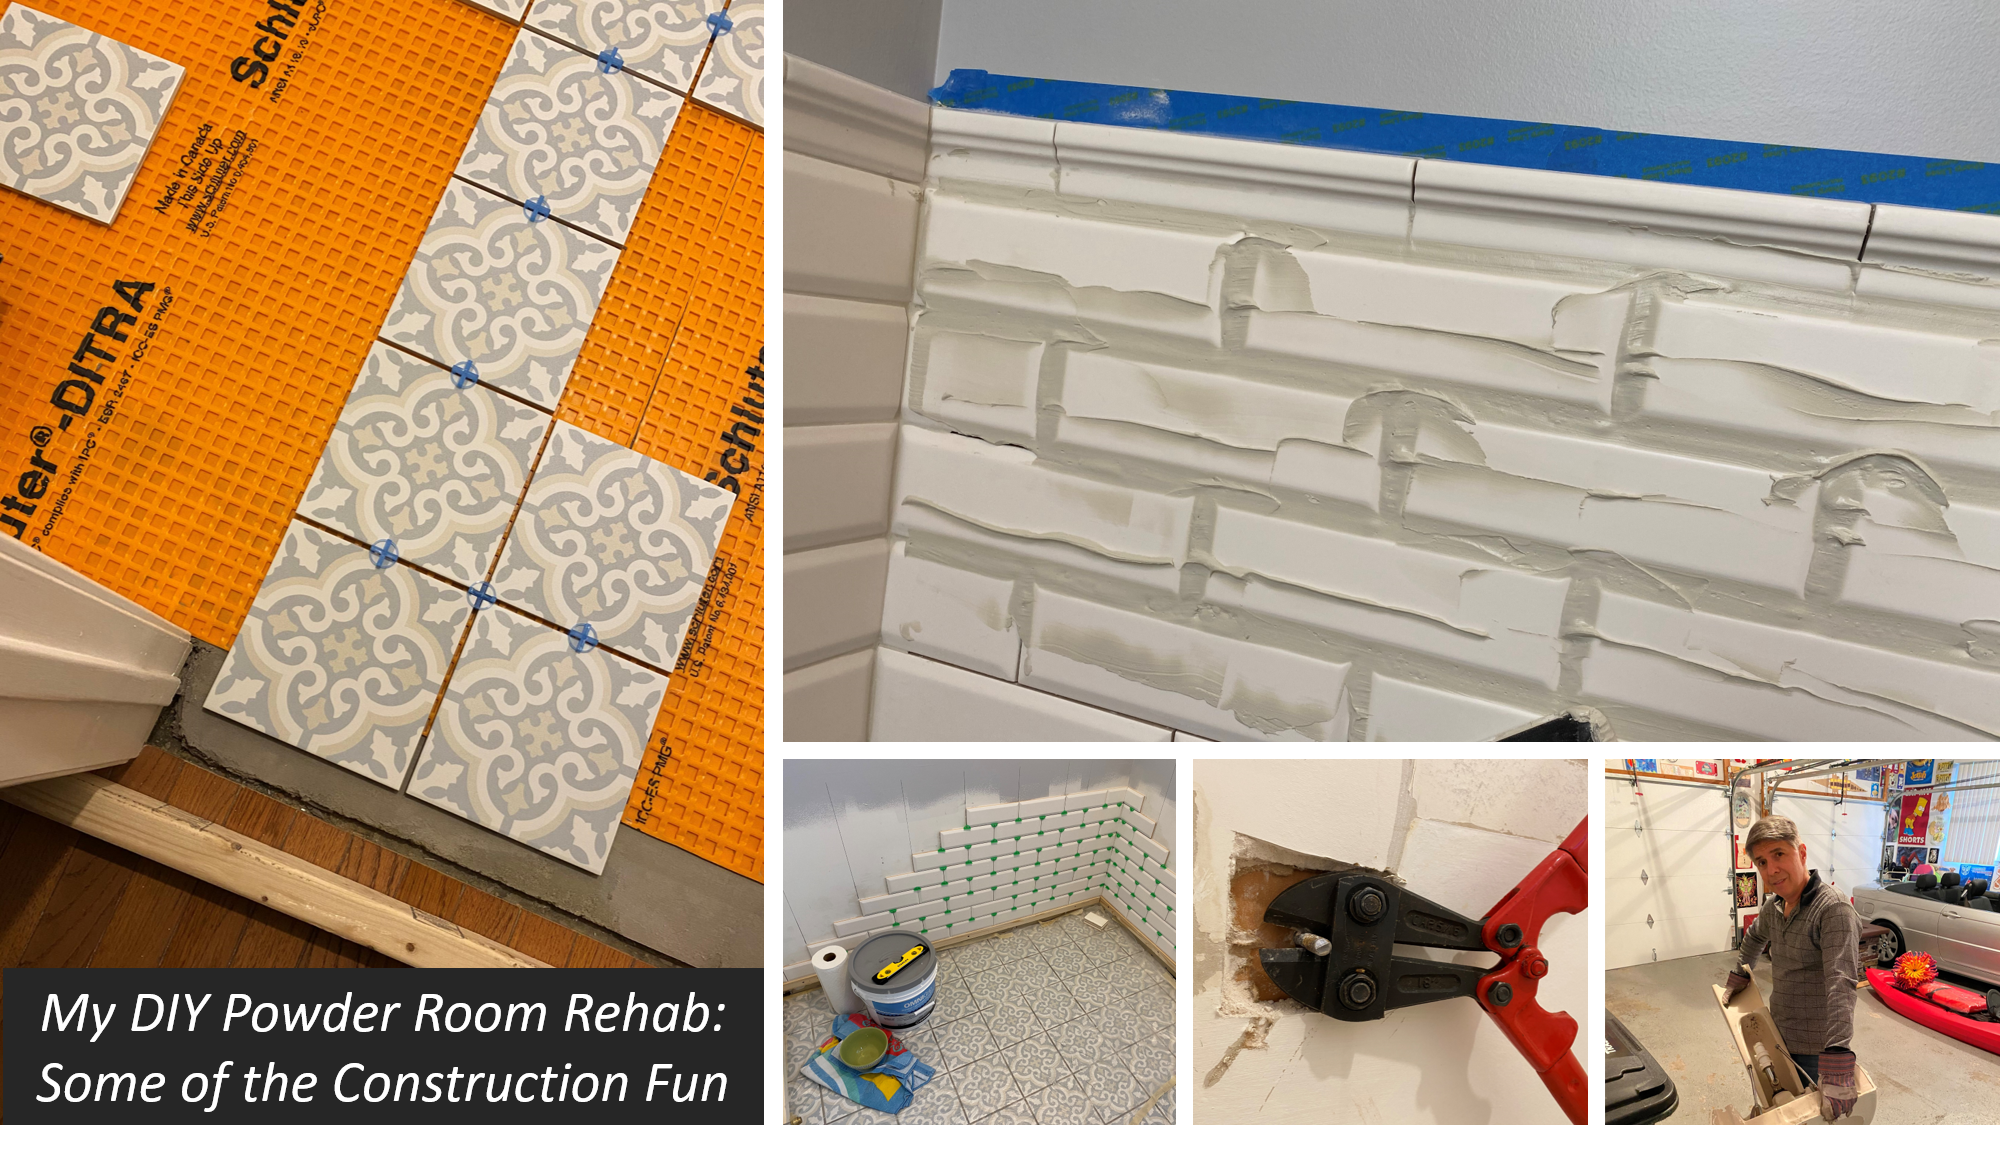
Demolition, Tiling, Grouting & Decorating
Wow – this is way too much to write into one article.
This project truly took me 4+ months of weekends, after all.
Below is a small collage of photos showing what’s to come in “Part 2” of this epic saga:
- Bathroom demolition,
- Subfloor preparation,
- Fun with thin set mortar,
- Installing and mitering beveled subway tile and porcelain chair rail,
- Grouting (OMG – I hate grouting so, so much),
- And some of the decorating nuances & creativity iterations we went through…

Questions, suggestions, or creative ideas on anything above… so far?
Please let us all know below – even if before the next article installment makes it online. Because it takes like ~10 minutes to answer a question or publish cool, creative thoughts and suggestions.
But writing these articles on the weekends… takes a lot… LONGER!! 😉
Whatcha think?
Need Professional Help from a Local Contractor?
• Visit Our Find a Contractor Page
Related Posts
• Installing a Marble Threshold
• Rehabbing My Crappy Fire Pit Patio
• Replacing a Bathroom Toilet: Mostly Easy, Not Too Gross
• Designing and Building your Perfect Deck
• Refreshing a Pool Landscape: Dead Hinoki Cypress & Solar Tiki Torches
• How to use a Submersible Pump to Remove Excess Pool Water

Leave a Reply