We’ve all become increasingly dependent on WiFi within our homes for our iPads, smart phones, game systems and laptops. And as great as this all has been (I love watching South Park from wherever I want), there are those occasionally-frustrating “dead spots” we have to tolerate. In this article, I’ll summarize my use of a WiFi Range Extender to not-only allow my signal to reach the tricky upstairs bedroom – but to also deliver a great signal out on the deck as well.
Yep – I can now Skype from my backyard!
And once I started down the right path, it was truly easy to do…
Searching for the Best WiFi Extender
It always starts out with a little bit of research – and for me, that’s a two-step process that begins with friends first, and then a visit to my favorite site for [unbiased] product user reviews: Amazon. One close friend (an Electrical Engineer) told me he had great success with a WiFi Range Extender that he picked up for a reasonable price. So, off to Amazon I went – and I ended up purchasing a Netgear N300 WiFi Extender.
The reviews were pretty-uniformly positive, and the number of reviewers was quite high as well; this gave me a lot of confidence. I’ve included a little snip of the review that convinced me to pull out my credit card and give it a try just below.
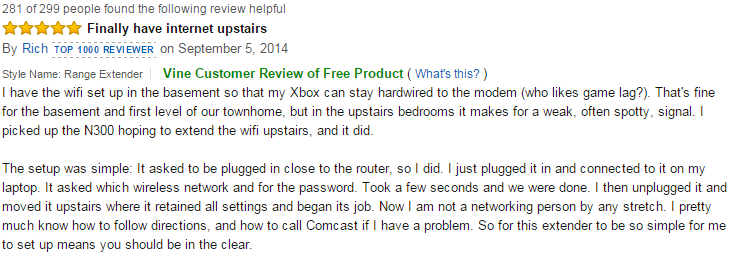
You can get to the review page for yourself by clicking here; there are surely new insights and user experiences appearing every day, and competitive product alternatives (almost certainly), as well.
WiFi Range Extenders: The Nuts and Bolts…
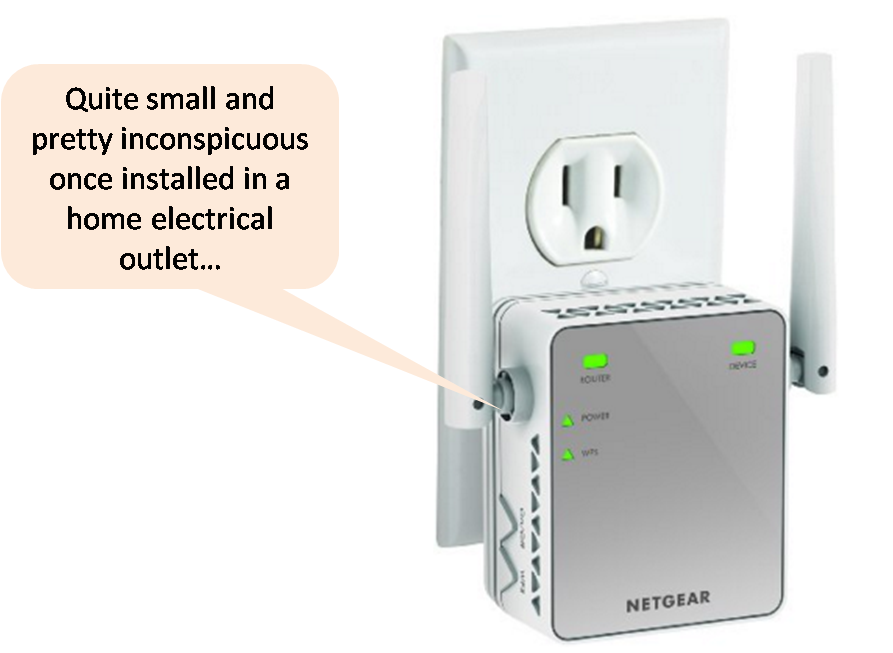
The Netgear N300 WiFi Extender is small – and it’s designed to plug into a home electrical outlet for power, but you locate it strategically so it can pick up your existing WiFi signal and then create a second WiFi zone to cover the area that you want the stronger signal to reach.
Unpacking and Basic WiFi Extender Set-Up
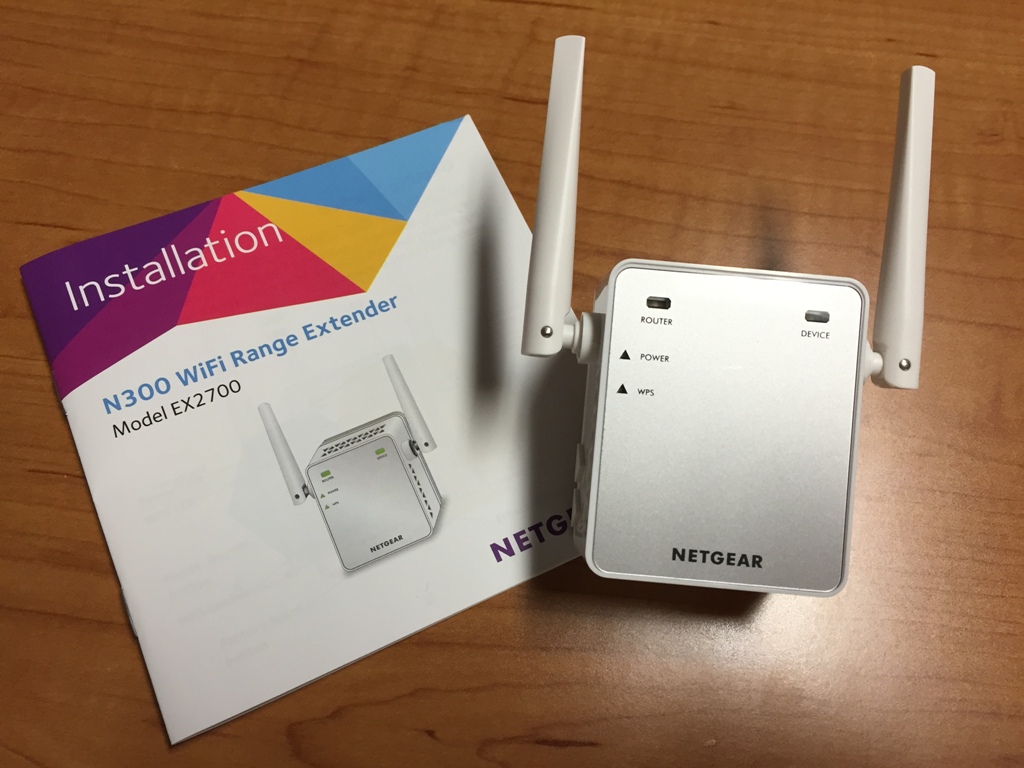
Here’s a photo of the actual unit and the instruction manual (courtesy of my iPhone 6 camera) after I unpacked them both at my house:
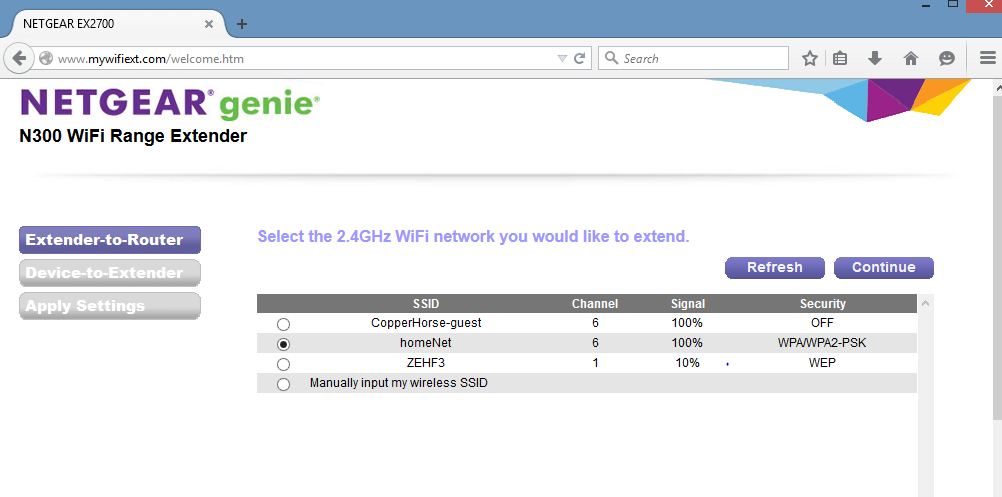
The set-up instructions start off by having you plug the device into an outlet near your router (where the WiFi signal will naturally be very strong) and then you’re directed to a URL that initiates a configuration wizard. I captured a couple of screen shots while I was going through this so you can see what it entails.
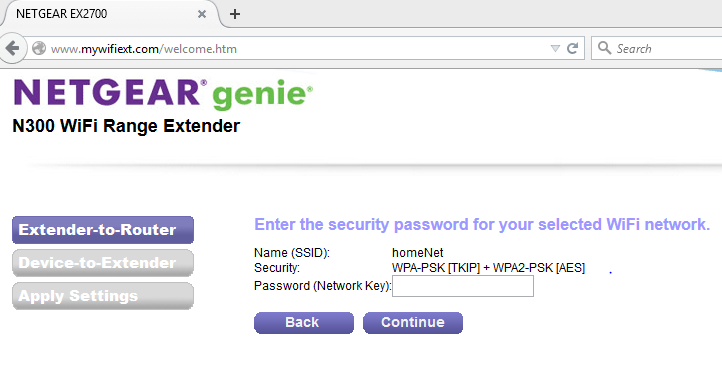
In the first shot below, I’m asked to select the network that’s mine – the network I want to extend. Now, my WiFi network name (also known as an SSID [Service Set Identifier]) is called homeNet. Not terribly original, I know.
You can see it appears in the list that follows, and at this point I’ve even selected it…
Next, I choose to replicate my security options in the new WiFi coverage area. And I’m then prompted for my password (Network Key), just like when you’re adding any new device to a secure WiFi network.
You can see the password request depicted in the next screen shot here…
Positioning the WiFi Booster
Once setup is complete (and there really isn’t much more to it than I described above for this specific WiFi extender), you unplug the device and move it to its target location. And selection of this location now depends completely on your goals…
To convey the location-selection nicely, I’ve taken [and slightly annotated] a picture from the Netgear documentation. In this graphical example, the blue coverage is intended to show your original WiFi coverage, while the yellow conceptually depicts the new coverage area you acquire via the WiFi Range Extender…

So, if you want a better signal upstairs, the device should be located in an electrical outlet somewhere in between – as long as it can receive a nice signal from the router which may be, for example, in your basement.
If you want a signal on your patio or deck, then the WiFi Extender should be located with line-of-sight access to your backyard, but again, it must be able to receive a good signal from your home router. So, once more – it’s essentially to be placed somewhere in between.
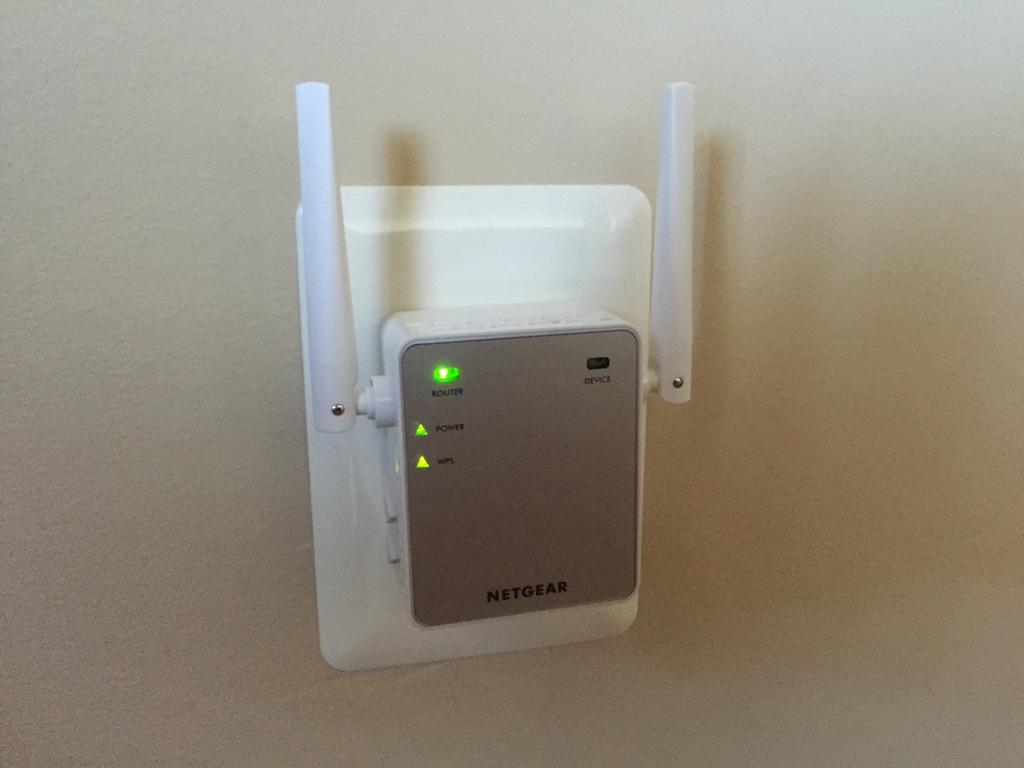
In the photo below, you can see I’ve plugged the WiFi Range Extender into my strategically selected electrical outlet. Note that the left side of the device is indicating connectivity to the basement router in my house – the green light on top is showing me that it’s receiving a good signal.
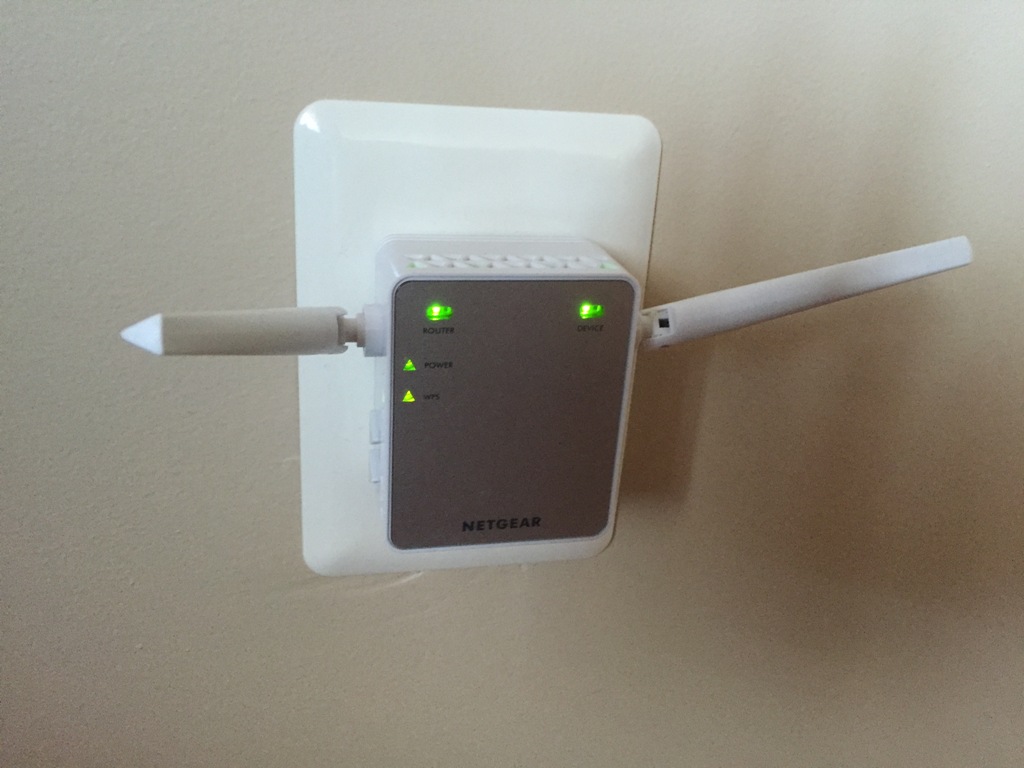
Now, in the next photo – note the following… the device is transmitting the extended WiFi range (the green light on the top right is on), plus I’ve adjusted the antennae to focus the signal energy into the regions most important to my specific objectives, which was upstairs coverage, and also toward the backyard deck. I managed to get them both!
Two SSIDs: 2 WiFi Network Names
Now, this is extremely important…
I mentioned earlier that my WiFi Network was named, “homeNet.” Yours will be different, almost certainly. The way that this WiFi Extender works is via creation of two separate zones – each with its own SSID: the original remains what it was, but a second is also created. The second network name will be the same as the first with a “_EXT” tagged on at the end. So, in my case – I now have “homeNet” and “homeNet_EXT,” the latter of which denotes the extension of homeNet.
I’ve called this out in the blue/yellow zone graphic above as well.
What this means is that WiFi devices in your home will now have two options.
Have a look at my iPhone WiFi selection screen below to understand what I mean. You can see that the device is currently connected to “homeNet_EXT” – but there’s also an option to connect to “homeNet.” There are now two WiFi access networks.
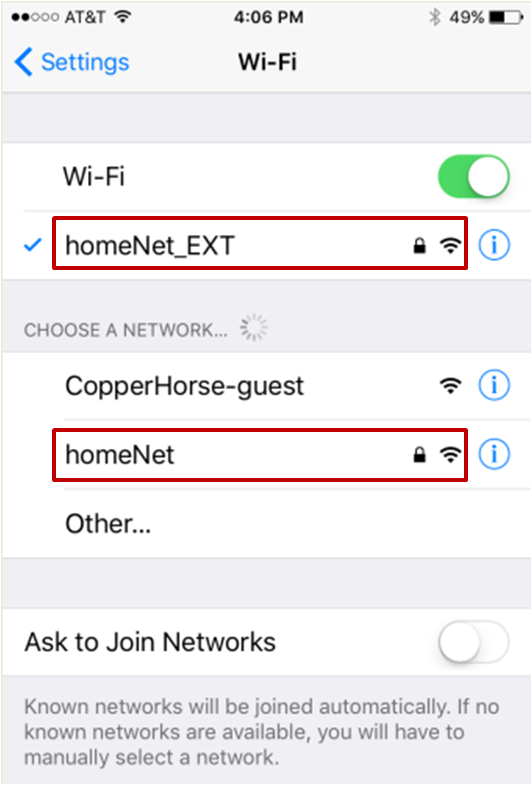
In this case, you can also see that I’m receiving a strong signal from both, but in different areas of the house (or backyard) that will surely not be the case.
So, with mobile devices – you now have two choices. If your Xbox One is not [generally] mobile, you’ll most likely want to connect to the SSID with the strongest signal. Or, if they’re both reasonably strong, the signal that gives you the best throughput and performance.
Testing WiFi Signal Performance
From a desktop or laptop, a terrific testing website that must be used speedtest.net. If you’re not aware of this, you really must try it, so you can see the kind of performance your Internet Service Provider (ISP) is delivering to your home.
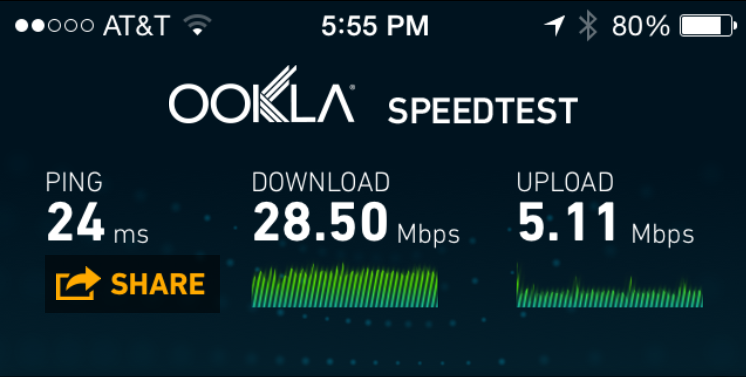
The same capability is available for smart phones via the respective app stores, and an example is illustrated in the screen shot snippet below as installed on my iPhone.
From this mini-screen-shot, you can see that the WiFi signal is pretty weak, but the throughput performance isn’t bad at all. This is where you have to use your best judgment. For your truly mobile devices, you’re going to be moving them all the time – so you’ll connect to whichever WiFi Network is available.
It’s those not-so-mobile devices (desktops, game systems and mostly-in-one-place laptops) that warrant special consideration. I, for example, would not want a home office computer connected to a WiFi signal as weak as the one illustrated above – that is, if I had another choice.
And with your WiFi Range extender, via the strategic selection and placement of your device in your home, this is precisely what you’re trying to accomplish: you’re providing that second choice. You’re providing a strong signal, where there was previously a weak signal – or maybe even no signal at all.
So you can now sit on your patio, enjoy a cold beverage – and stream music without incurring LTE data charges!
And really, doesn’t that just make life a little bit better overall??

Leave a Reply