2021 [Pi Day] Update, Originally Published August 2020…
Marble thresholds (sometimes called marble saddles) are very common in many homes, often found at bathroom entries.
They look really nice, they’re cool and smooth to the touch – and they’re not terribly expensive.
Having recently installed a marble threshold as part of a more comprehensive home rehab project, this summary shows the steps I took – along with the tool and material details. Some Amazon links to key items as well.
For me, in light of the much larger effort, this saddle installation was a quick and easy project that was frankly kind of fun to tackle!
It was an improvisation that led me to this marble threshold installation…
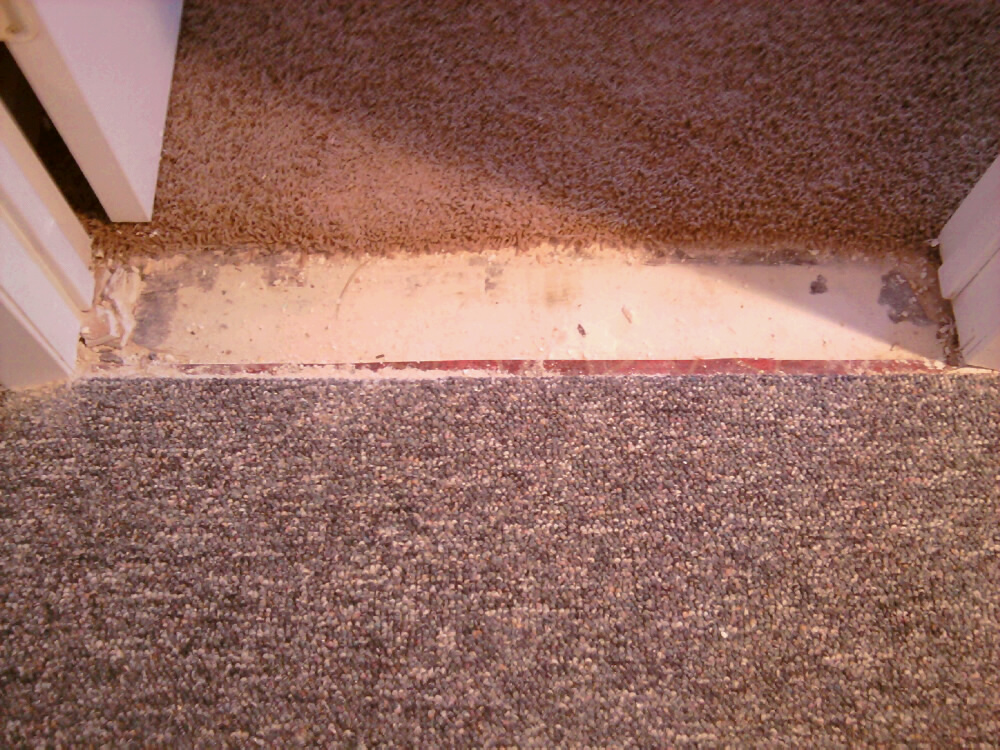
The Ugly Concrete Slab
After re-creating a doorway that had previously been removed, I found myself in a bit of a quandary staring down at carpeting on both side of the newly installed door and jamb – with a very distinct area of nasty-looking concrete slab in between…
This home was being prepared for sale, and clearly this had to be addressed.
There were no remnants of the original carpeting from the rooms on either side of the doorway, and both carpets were old – having been installed at least 8-10 years prior. One was even fraying a bit, which wasn’t really surprising at it was recently up against a wall that no longer existed.
Seeing no practical way to address this repair with carpeting, a nice marble threshold seemed a potentially perfect way to go, as long as I could find one of the appropriate width. (Ideally, I wanted to cover all the concrete and also pin down just a small bit of both carpets as well – hold them down and address the fraying.)
Installation Tools and Materials
It took only a single trip to the hardware store; I was really happy to see a significant variety of marble threshold widths, even some tapered on one or both sides. The length was a concern as well, of course – but much less so. It only takes one cut with a wet saw to get the proper length, and some hardware stores may even do this for you if you don’t own a wet saw yet, usually for a small fee.
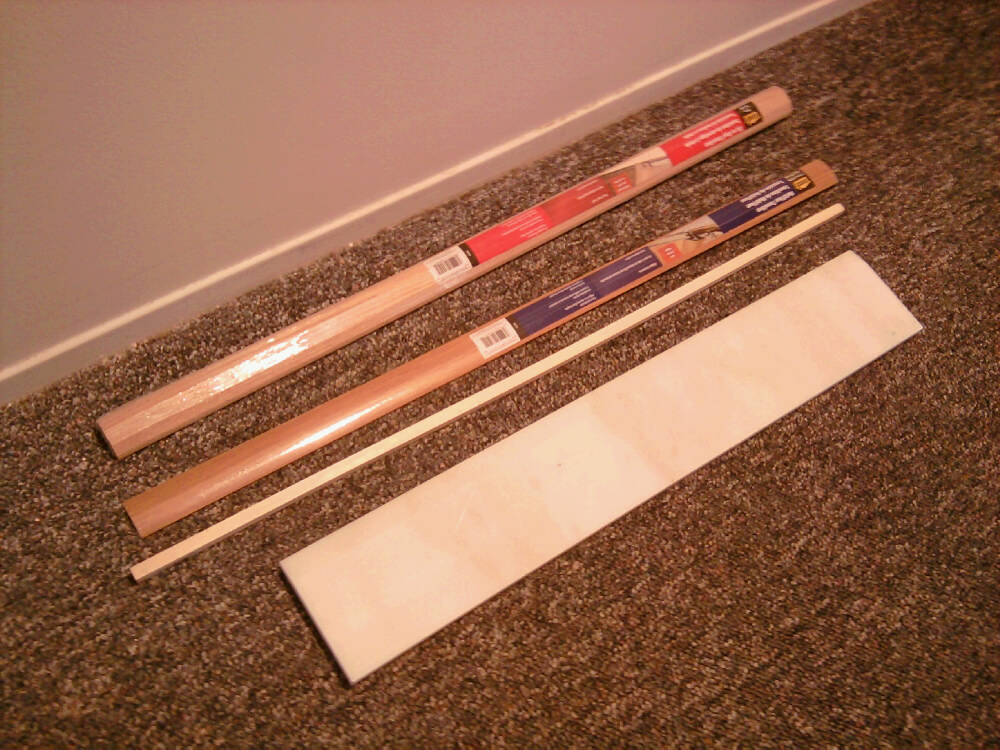
In addition to the marble threshold, I also picked up a number of wood trim pieces as this was truly an improvisation effort and I wasn’t completely sure the marble would be enough. I always find it best to buy extra material (for most every project) – and then return whatever I don’t use afterwards.
Was a great stroke of luck that the marble threshold I found was exactly the right length – no wet saw needed for me. (Not that I don’t own one, but it happened to be located in another state at the time!)
Additional tools and materials I assembled for this effort included:
- My shop vac – for preparation and clean up
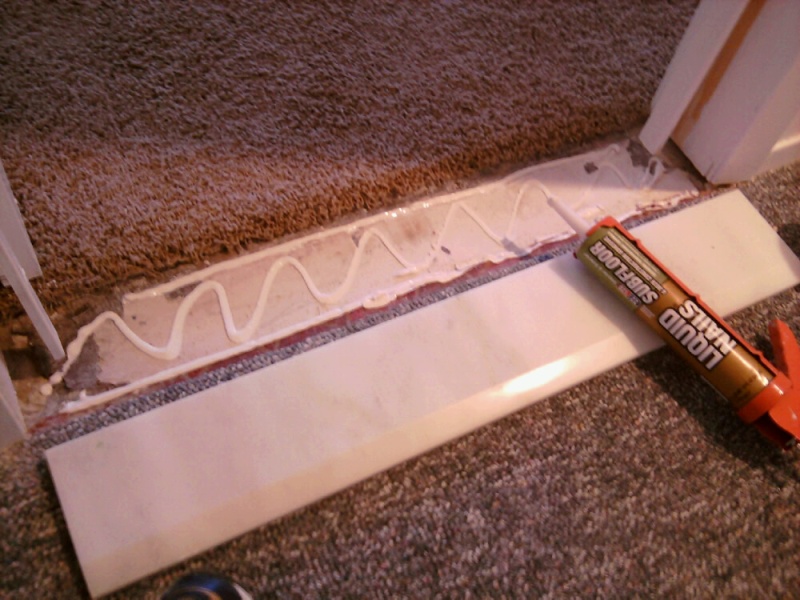
- A tube of Liquid Nails subfloor
- A tube of Phenoseal white caulk
- Interior semigloss paint for touching-up the door jamb
Check out the Amazon links above for more information and insight, but these items can be acquired pretty much anywhere. And, of course, this is merely what I did – this can be changed-up in many ways, I’m sure. But you’ll see each of these items used in the installation photos that follow.
On a personal note, though, I find Phenoseal and liquid nails to be useful in many, many situations. To me, they’re both right up there with duct tape and zip ties… :-)
Installing the Marble Threshold
The photos that follow show each step of the process I followed, and this took less than an hour for sure. Naturally, it’s always best to be as meticulous and careful as possible – and that’s what took much of the time.
First – I cleaned up the work area as best possible…
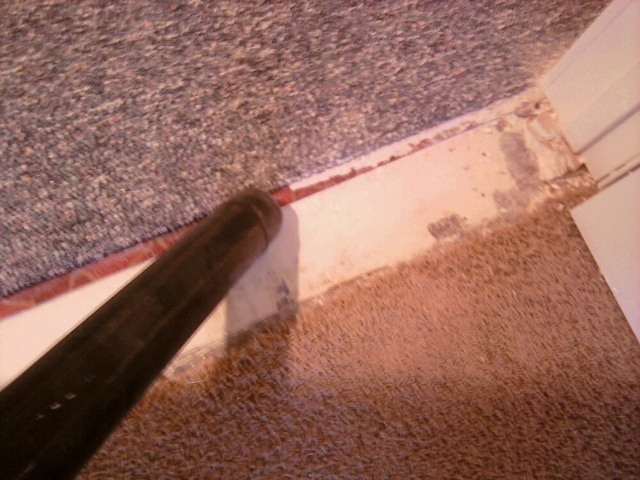
All debris was removed from the concrete slab and the carpets were trimmed gently where frayed material was hanging loosely. I was careful to keep all carpet trimmings as I though I might find a use for them in case the marble saddle didn’t fit perfectly.
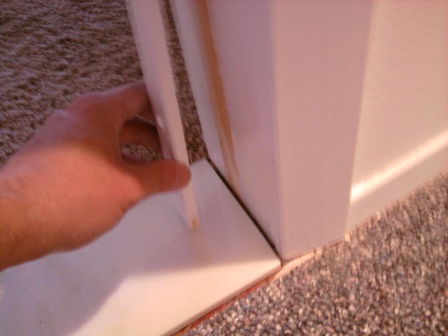
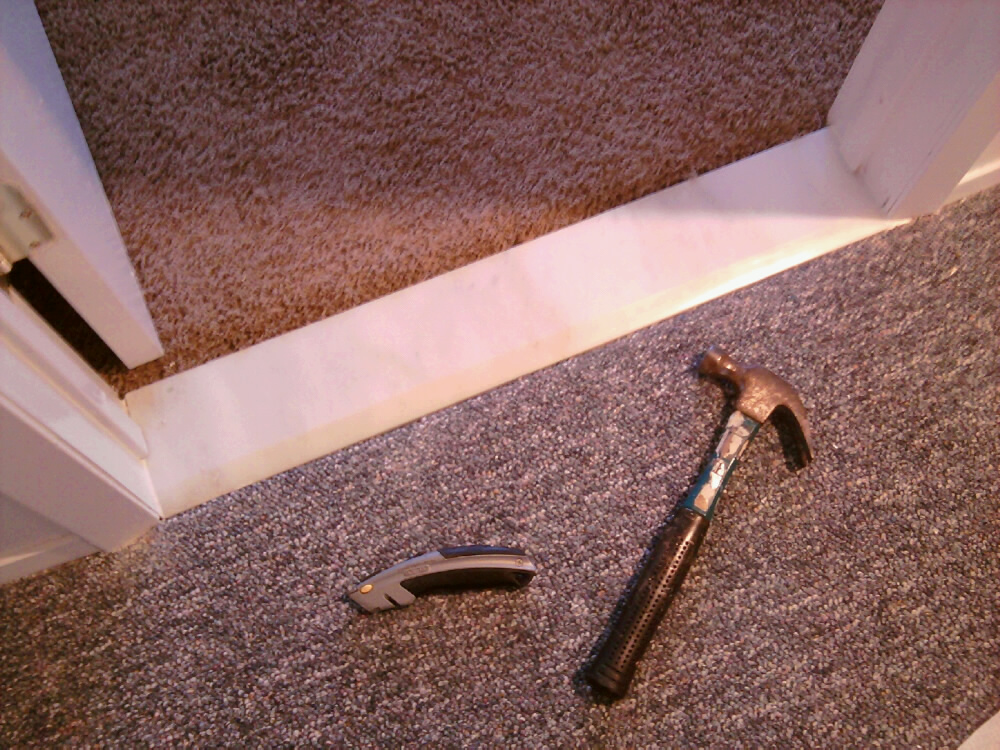
In order to test the saddle for fit, I found it necessary to partially remove the inner trim pieces on the bottom inside of the door jamb as shown below. Did this very carefully with a sharp razor knife and a flat screwdriver…
Once I was positive that all fit beautifully, I applied some of the subfloor Liquid Nails as shown – making sure not to overdo it. I surely didn’t want any of this oozing out onto the carpets after the marble threshold was positioned!
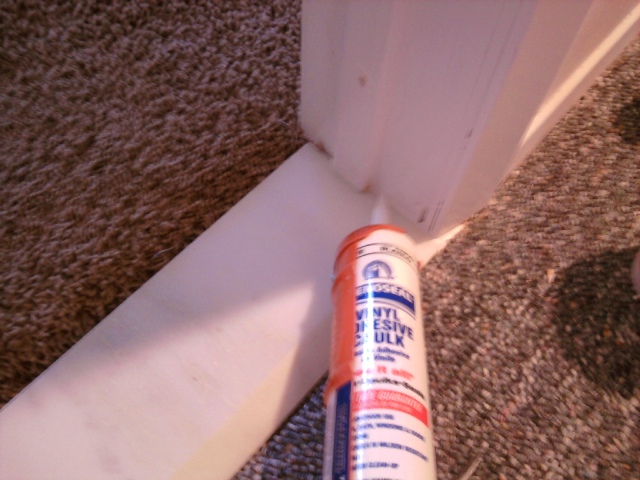
Once the saddle was sitting nicely in place, it was time to restore the door jamb, adding some of that Phenoseal caulk to fill the nicely – and then I touched up the door jamb in total with the matching touch-up paint…
I ended up using some of the carpet trimmings to make everything look a little nicer in one small area… I guess sort-of like hair plugs on a receding hairline? But I never had to use anything other than the marble for the threshold – the other extra wood trim pieces I bought were happily taken back by the hardware store.
Some final shots of the final room transitions…
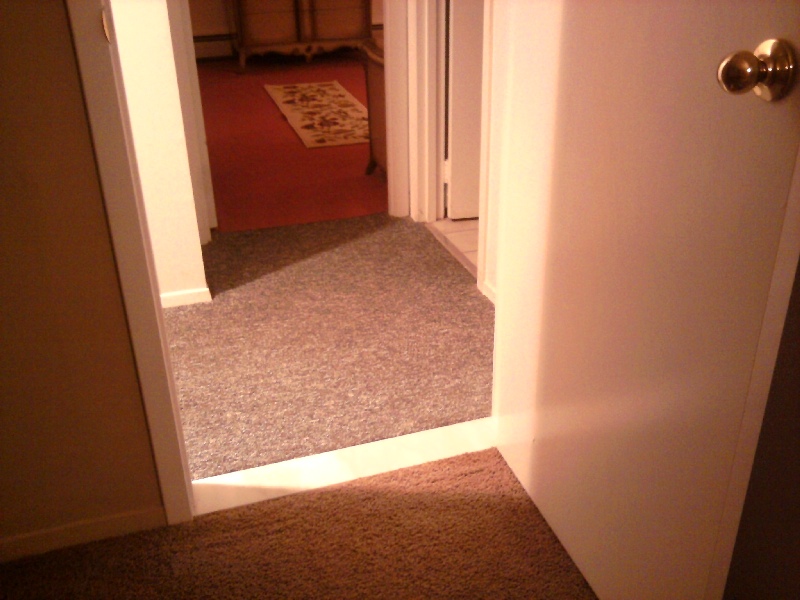
So, again – a quick and genuinely fun little effort, with a really nice aesthetic impact in the end. Everything looks clean, crisp and properly finished.
What’s really pretty cool is that this home sold almost immediately when we finally put it on the market. Very close to the asking price as well. I’m not so sure it would have gone quite as well with that ugly concrete slab exposed as it was!
Need Professional Help From a Local Contractor?
• Visit Our “Find a Contractor” Page
Related Posts
• Carpet Tiles for a Quick Rehab
• Rehabbing a Redwood Swing Set
• Troubleshooting and Repairing a Broken Doorbell
• How to Repair a Leaky Basement Wall
• How to Build a Backyard Playhouse
• Redwood Swing Set Maintenance Tips

That looks great. Do you have any suggestions for putting down a marble or similar material threshold on a hard wood floor up against ceramic tile? I’m not sure what the best threshold material is to use and what to use to fasten it down. Also… Does anything go under it?
Thanks!
Tom
See the comment and 6 photos just below, Tom – I just did this, maybe 3 weeks ago. Ceramic tile to hardwood. Thin set mortar is what I used under here, which is more conventional than what I did in the main article above. The material was a composite that I found at a local hardware store; it wasn’t marble, but I could still cut it with a wet saw nice and cleanly. If you don’t have a wet saw, they’ll likely be able to cut it for you at the hardware store. Just be sure you measure very carefully, of course!
A powder room rehab this time, and here I used thin set mortar under my threshold as the ‘final step’ of putting down the floor tiles as you can see below.
Instead of carpet on each side of the threshold, we’re now mated to hardwood and tile. And because of the tile color, I opted to go with a solid white threshold (instead of marble) so as not to compete or clash…