During the ten years I’ve lived at this house, my doorbell has died on me twice already – and now it’s dead again.
Replacing a doorbell isn’t terribly complicated, but given the repeated failures I’ve had it seemed a good idea to really check on everything more carefully than I’d done in the past. This summary won’t cover every nuance associated with every type of doorbell, but it will illustrate a fundamental approach for troubleshooting and replacing only those components that really warrant replacement.
I had a conventional wired chime doorbell – this is your “ding-dong” type of system as opposed to an electronic doorbell that may play various songs. The basic principles below can apply to both, though, and I’ll distinguish below where things may differ. In fact, I ended up replacing my chime system with an electronic system. My kids love the songs.
Basic Chime Door Bell System Components
There are three components in a conventional doorbell system: 1) the push-button outside of the house, 2) the doorbell unit itself (inside by the front door) and 3) the transformer.
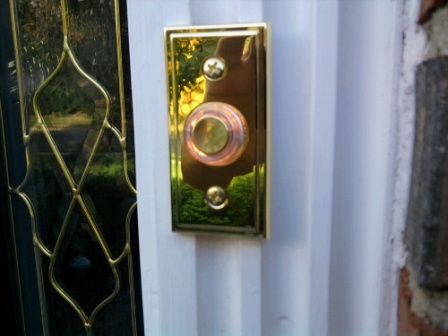
1. The Push-Button: This is what everyone thinks of when they hear the word, “doorbell.” This is the button you push outside of the front door.
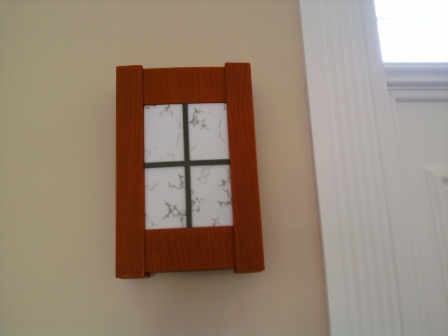
2. The Doorbell Unit: The unit in your house that creates the chime, the buzzer sound or possibly even plays a bit of Beethoven’s Fifth in C-Minor.
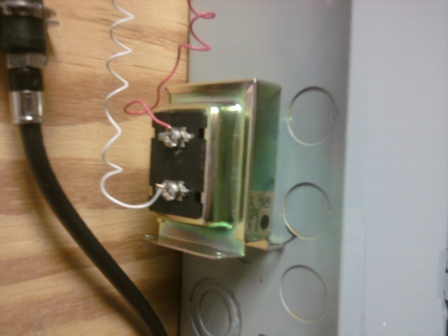
3. The Doorbell Transformer: Transformers are used to convert [transform] electrical voltages. Doorbell transformers, in particular, take line voltage (which is about 120V AC where I live) and convert this down to a lower value as required by your doorbell unit. For the system I had in my house, 16V AC was the required voltage – but this can vary. Doorbell transformers are usually connected directly to your electrical panel, and you can find the output voltage marked on the transformer itself. It’s imperative that your transformer output match the input required by your doorbell unit!
Troubleshooting a Broken Doorbell System
Excluding the transformer, this is a low-voltage system. Be careful, as always, with anything electrical – don’t short (touch) bare wires together unless intentionally doing so for testing, but you’ll need the power active for the troubleshooting steps summarized below.
So, let’s start testing as follows…
(A) Test the Doorbell Push Button
The doorbell push-button is usually removed with 2 screws. Once you have this off, carefully detach the two wires from the back and then put the push-button can all screws carefully aside. Intentionally touch these two bare wires together. If the doorbell rings, the push-button is bad and needs to be replaced. Congratulations – you got off easy!
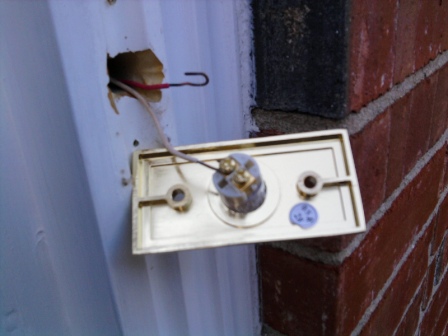
NOTE: When replacing the push-button (or installing a new one), be very careful if there was another electronic element connected between the posts with the wires. House-powered electronic doorbell units, in particular, require a “diode” be connected between the terminals to continue providing electricity to the circuit after the push-button is released. It can be tricky to wire all of this because there’s only a very small space between those screws! Plus, even if you get it right, you still have to stuff everything back onto (and possibly into) the door casing as you can see from the picture above. It’s quite easy to cause a short.
If you have a short, you’ll know it because your doorbell will keep ringing.
If you need a diode (for an electronic doorbell unit) and it’s not connected, you’ll know it because the doorbell song will start playing and then quickly stop after the button is released. There’s no diode depicted in the above picture.
(B) Test Voltage to the Door Bell Unit
So, the push-button was fine and your doorbell still isn’t ringing? Not a good sign. First, find out the required voltage to the doorbell unit. You can get this from the manual, the manufacturer’s website or it may be stamped on the doorbell unit itself once you remove the outside cover.
Now, you have to test this with a voltmeter.
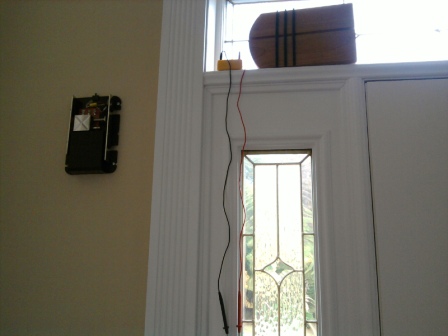
In the picture above, you can see I’ve removed the doorbell-unit cover and I have my voltmeter sitting on the ledge with the test leads dangling. Set your voltmeter to the appropriate AC voltage range and touch each test lead onto a post. If the voltmeter reads the correct input voltage, the doorbell unit is bad and needs to be replaced.
If you need to purchase another doorbell unit, be SURE it’s rated for the output voltage provided by your existing transformer. The voltages have to match. Also, it’s an extremely good idea to label the wires before removing them from the old doorbell unit. You can see I’ve labeled one of the red wires with tape below. (It’s very easy to lose track of which wire connects to which post otherwise, and there’s no need for that frustration.)

(C) Test the Doorbell Transformer Voltage
So, the push-button was fine and your doorbell was *not* receiving the correct voltage from the transformer? Two possibilities remain, both of which require you now test the output voltage from the transformer. Get your voltmeter again, and read the transformer output.
If you read the correct output voltage at the transformer – but zero voltage at the doorbell unit, your wiring is damaged between the transformer and the doorbell unit. This is unlikely but certainly possible. Find and repair the damaged wire – then wrap with electrical tape.
If you read the incorrect output voltage at the transformer, the transformer is defective (or mismatched to the doorbell unit) and needs to be replaced. Unless you know exactly what you’re doing, this is for an electrician because once you open that electrical panel it becomes quite dangerous. Also be aware that there’s a good chance this may have damaged your doorbell unit, and you may need to replace that as well. Get the transformer replaced first, and then see if your doorbell unit works at all.
Wireless Doorbell Systems
In the coming days, if you find yourself shopping for a replacement doorbell, you will also come across wireless doorbell systems. With these, you have a push-button transmitter outside of the house and a mated receiver built into the doorbell unit. No wires. Within the house, the transformer may be used – but even this is no longer truly necessary as the doorbell unit may be powered with batteries or it can simply plug into an outlet. (In fact, electronic doorbell systems often have the option of battery power as well, and can sometimes be turned into wireless systems in total.) One nice advantage to wireless doorbell systems is that it’s easy to have numerous doorbell units in the house, all associated with the one push-button outside the front door. You can even install doorbell units in the backyard or garage, so it’s much easier to hear the bell from remote areas. Some even provide the option to flash a light as a secondary indicator.
Conventional “wired” chime doorbell systems (like the one I replaced above) are still used all over – they’re sturdy and cost effective. But everything evolves over time.
So – What was wrong with my Chime Door Bell?
The transformer was fine, the voltages were matched (via markings on the transformer and more importantly, by explicit measurement) and the push-button worked – though I opted to change it anyway as it was starting to look a little ratty.
It seems my doorbell unit itself just burned out. Again.
So, why do I lose a doorbell every 3-4 years then?
“Best I can tell, I just have bad doorbell luck.” That was what I said when I wrote the first version of this article a few years back – but there was one additional failure possibility I didn’t realize even here, pretty specific to the orientation and facade of my particular house. And, for me, it was this: I needed a waterproof doorbell. Yup. Waterproof. Read about the ‘enlightenment’ I had in this wireless waterproof doorbell follow-on article right here. It may well apply to you as well.

Leave a Reply